Alpine Stitch V-Neck Tee: Free Crochet Pattern
Introduction
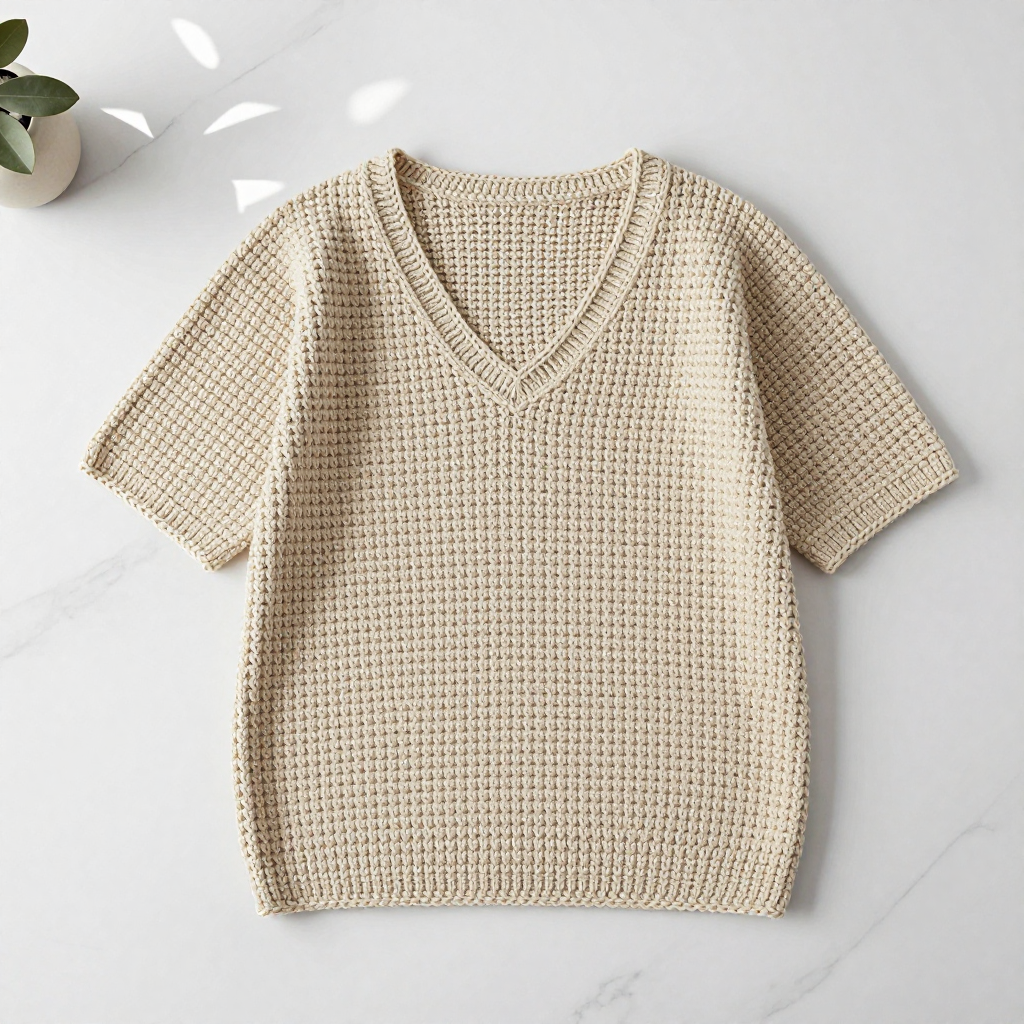
This Alpine Stitch V-Neck Tee is a gentle, beginner-friendly project for anyone who has mastered single and double crochet and wants to make their first real garment. Worked in a natural, undyed aran wool blend, it has a soft, slightly rustic look that feels warm but breathable against the skin. The alpine stitch gives the fabric a raised, textured surface that catches the light and hides small tension wobbles, so it looks polished even while you are still learning. With its boxy teen S-M fit, short straight sleeves, and simple V-neck, it is perfect for Mediterranean summer evenings and easy autumn layering.
Materials Needed
- Yarn: Aran weight (worsted) wool blend, approximately 800-900 yards total. Sample uses natural undyed color, approx 850 yards.
- Hook: 5.0 mm (US H-8)
- Notions: Tapestry needle, stitch markers, measuring tape, scissors
- Finished size: To fit teen sizes S-M: bust 32-34 inches, length 20 inches, sleeve length 6 inches
Abbreviations
- ch — chain
- dc — double crochet
- sc — single crochet
- dc2tog — double crochet two stitches together (a decrease)
- sc2tog — single crochet two stitches together (a decrease)
- st(s) — stitch(es)
- RS — right side (the outside of the fabric)
- sl st — slip stitch
- rep — repeat
Gauge
14 stitches and 8 rows = 4 inches (10 cm) in alpine stitch pattern. Work a small swatch in pattern and measure across the middle to check your gauge before starting.
Tips Before You Start
- Alpine stitch alternates sc and dc rows; keep your turning chains loose so the side edges stay straight and easy to seam.
- Count your stitches at the end of every row — the pattern stays at 56 stitches until the V-neck shaping begins.
- Mark the center stitch of the front panel before Row 31 so your V-neck decreases stay centered and symmetrical.
- Work both front sides and both sleeves one after the other so your tension stays consistent across matching pieces.
Step-by-Step Instructions
Front Panel
Row 1 (RS): Ch 58, dc in 4th ch from hook and in each ch across (56 dc).
Row 2: Ch 2, turn, sc in first st, *dc in next st, sc in next st; rep from * across, ending with sc in last st (56 sts).
Row 3: Ch 2, turn, dc in first st, *sc in next st, dc in next st; rep from * across, ending with dc in last st (56 sts).
Rows 4-30: Rep Rows 2-3, maintaining alpine stitch pattern (alternating sc and dc rows) (56 sts).
Shape V-Neck (Front, First Side)
Row 31: Ch 2, turn, work in pattern across first 27 sts, dc2tog over next 2 sts (center decrease), leave remaining 27 sts unworked (28 sts).
Row 32: Ch 2, turn, work in pattern across 28 sts (28 sts).
Row 33: Ch 2, turn, work in pattern across 26 sts, dc2tog over last 2 sts (27 sts).
Rows 34-40: Rep Rows 32-33 three times, then work even in pattern for 2 rows (24 sts). Fasten off.
Shape V-Neck (Front, Second Side)
Rejoin yarn to opposite side of Row 30 and work the mirror image.
Row 31: Ch 2, dc2tog over first 2 sts, work in pattern across remaining 27 sts (28 sts).
Row 32: Ch 2, turn, work in pattern across 28 sts (28 sts).
Row 33: Ch 2, turn, dc2tog over first 2 sts, work in pattern across remaining 26 sts (27 sts).
Rows 34-40: Rep Rows 32-33 three times, then work even in pattern for 2 rows (24 sts). Fasten off.
Back Panel
Rows 1-30: Work same as Front Rows 1-30 (56 sts).
Rows 31-40: Work even in pattern across all 56 sts (56 sts). Fasten off.
Sleeves (make 2)
Row 1 (RS): Ch 42, dc in 4th ch from hook and in each ch across (40 dc).
Row 2: Ch 2, turn, sc in first st, *dc in next st, sc in next st; rep from * across, ending with sc in last st (40 sts).
Row 3: Ch 2, turn, dc in first st, *sc in next st, dc in next st; rep from * across, ending with dc in last st (40 sts).
Rows 4-12: Rep Rows 2-3, maintaining alpine stitch pattern (40 sts). Fasten off.
Neckline Edging
With RS facing, join yarn at the V-neck point.
Round 1: Ch 1, sc evenly around entire neckline, working sc2tog at the V-point. Join with sl st to first sc. Fasten off.
Assembly and Finishing
With RS facing, sew the shoulder seams. Sew the side seams from the bottom up to the armholes, leaving 7 inches open for the armholes. Sew each sleeve seam, then set the sleeves into the armholes. Weave in all ends. Block lightly by misting with water and pinning to the finished measurements (bust 32-34 inches, length 20 inches), then let it dry flat.
Pro Tips and Variations
- For a deeper V, add one extra decrease row on each front side before finishing.
- Try a contrasting edging color on the neckline for a subtle pop against the natural undyed wool.
- Lengthen the body by working a few extra even rows on both front and back before the V-neck shaping.