Mossy Garter Circle Pouf: Free Knit Pattern
Introduction
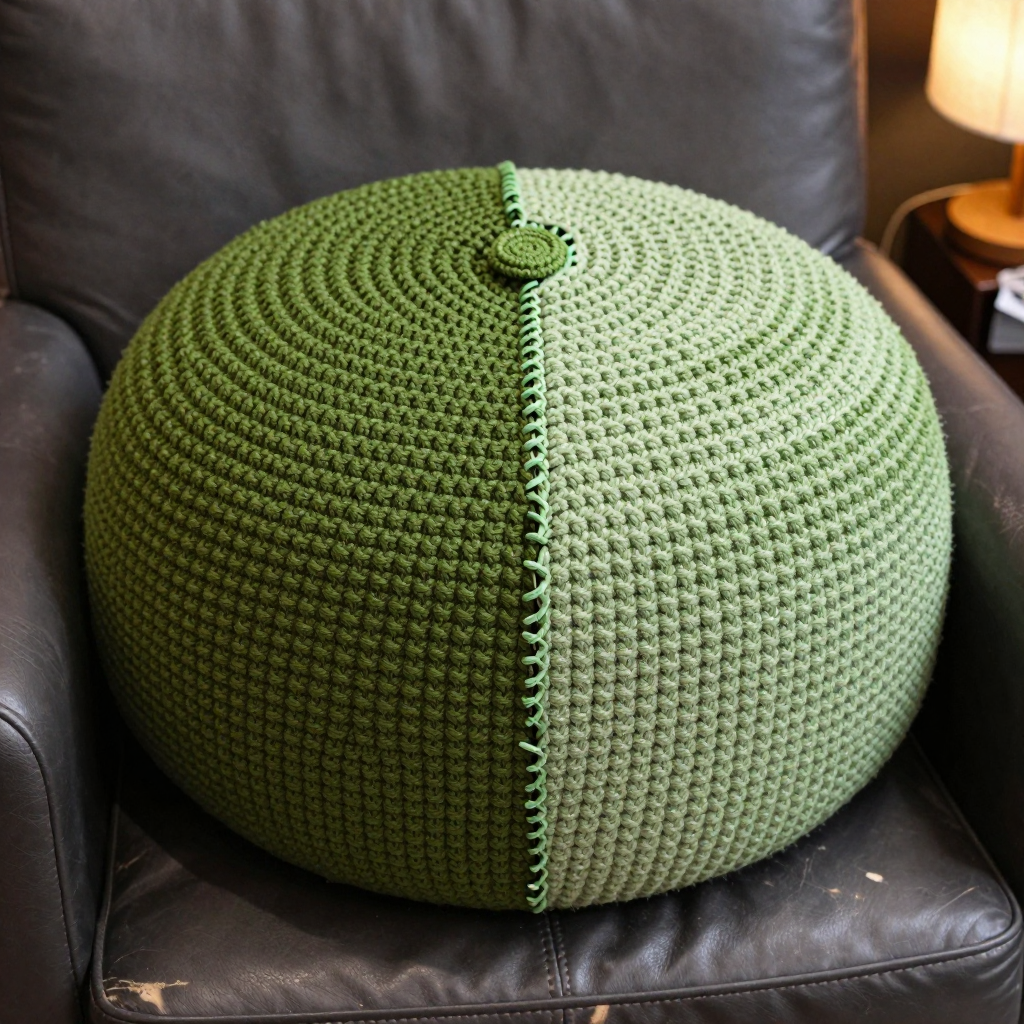
The Mossy Garter Circle Pouf is a squishy, round floor cushion that brings a little woodland calm to any room. It is written for knitters who are comfortable with the knit stitch and a basic decrease, and it is a wonderful first "big" project because every piece is flat and simple. Two garter-stitch panels — one in deep moss green, one in a lighter lichen tone — are joined edge to edge around a stuffed middle, so the finished pouf looks like two soft halves of a stone. The velvet yarn gives it a plush, velvety texture that feels wonderful underfoot, and a tiny knitted button pulls the center into a gentle dimple for a boho finishing touch.
Materials Needed
- Yarn: Worsted weight (category 4) velvet yarn, 100% polyester, approximately 300 yards per 100 g skein.
- Color A (Moss): 3 skeins (about 900 yards)
- Color B (Lichen): 1 skein (about 300 yards)
- Needles: 5.0 mm (US 8) circular needles, 24-inch length, or size needed to obtain gauge. (You work flat, but circulars hold the many stitches comfortably.)
- Notions: Tapestry needle, stitch markers (optional), scissors, polyester fiberfill or a round cushion insert (about 20 inches / 51 cm), pins for seaming.
- Finished size: Approximately 20 inches (51 cm) in diameter and 12 inches (30 cm) tall when stuffed.
Abbreviations
- st(s): stitch(es)
- RS: right side (the outside face of the work)
- WS: wrong side (the inside face of the work)
- K: knit
- P: purl
- K2tog: knit two stitches together — insert the needle through two stitches at once and knit them as one, decreasing by one stitch.
- Sl1: slip one stitch from the left needle to the right needle without working it.
- psso: pass the slipped stitch over — lift the slipped stitch over the stitch just worked and off the needle, decreasing by one stitch.
- Garter stitch: knitting every row, which produces flat, horizontal ridges.
Gauge
16 stitches and 32 rows = 4 inches (10 cm) in garter stitch, measured flat after blocking. To check it, knit a small swatch in garter stitch, block it lightly, and count stitches and rows over 4 inches; adjust your needle size if needed so your panels finish at the right size.
Tips Before You Start
- Velvet yarn can shed and slip, so keep your tension relaxed and avoid tugging the working yarn tightly — smooth, even stitches give the best plush finish.
- Count your stitches at the end of every few rows; garter stitch is forgiving, but an accurate 80-stitch width keeps both panels the same size for easy seaming.
- Because the panels are worked flat and joined later, mark your RS with a removable marker or a scrap of contrasting yarn so you always know which face is which.
- Stuff the pouf gradually in small handfuls, working from the edges toward the center, so it fills evenly without lumps.
Step-by-Step Instructions
Panel 1 (Color A — Moss)
Cast on: Using the circular needle and color A, cast on 80 sts.
Rows 1–40: Knit every stitch (garter stitch), turning at the end of each row, ending with a WS row (80 sts).
Bind off: Bind off all 80 sts. Fasten off, leaving a tail about 12 inches (30 cm) long for seaming.
Panel 2 (Color B — Lichen)
Work exactly the same as Panel 1, using color B.
Cast on: With color B, cast on 80 sts.
Rows 1–40: Knit every stitch (garter stitch), ending with a WS row (80 sts).
Bind off: Bind off all 80 sts. Fasten off, leaving a 12-inch (30 cm) tail.
Button (Color A)
Cast on: With color A, cast on 10 sts.
Row 1: Knit (10 sts).
Row 2: Purl (10 sts).
Row 3: Knit (10 sts).
Row 4: Purl (10 sts).
Row 5: [K2tog] 5 times (5 sts).
Row 6: Purl (5 sts).
Row 7: K1, [K2tog] twice (3 sts).
Row 8: Purl (3 sts).
Row 9: Sl1, K2tog, psso (1 st).
Finish: Fasten off the last stitch, leaving a tail for attaching the button.
Assembly and Finishing
Seam the panels: With RS together, pin Panel 1 and Panel 2 edges together, aligning the cast-on and bind-off edges. Using color A and mattress stitch, sew the panels together around the entire circumference, leaving a 6-inch (15 cm) opening.
Turn and stuff: Turn the pouf RS out. Stuff firmly with polyester fiberfill or a round cushion insert, adjusting to your desired firmness.
Close the opening: Sew the 6-inch opening closed with mattress stitch in color A.
Attach the button: Using color A and the tapestry needle, attach the knitted button to the center of Panel 1, sewing through both panels to create a dimple. Pull gently until the center sinks slightly, then secure firmly.
Weave in ends: Weave in all remaining ends on the WS, taking care not to pull the velvet yarn too tight.
Block: Lightly mist and shape the finished pouf, or steam gently from a distance, then let it dry fully before use.
Pro Tips and Variations
- Two-tone swap: Reverse the colors so the lichen panel faces up, or use a third velvet shade for the button to make it pop.
- Firmer or softer: Add a round cushion insert inside the fiberfill for extra structure, or use less stuffing for a slouchier floor cushion.
- Textured twist: Work one panel in garter stitch and the other in stockinette (knit RS rows, purl WS rows) for a smooth-and-ridged contrast that still joins easily edge to edge.