Acorn Cap Baby Rattle Crochet Free Pattern
Acorn Cap Baby Rattle Crochet Free Pattern
Introduction
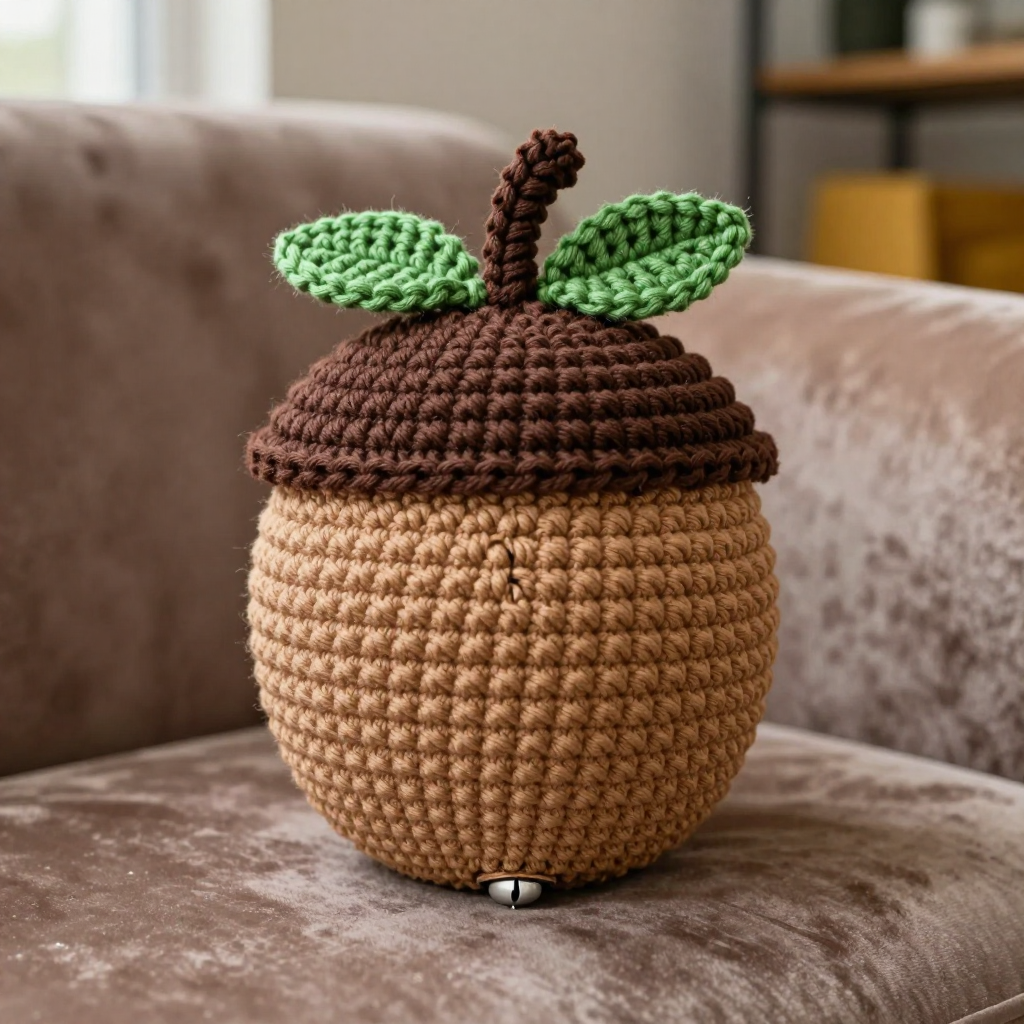
This little acorn rattle is a woodland-inspired baby toy that fits perfectly in tiny hands. It's made for beginners who are comfortable with single crochet and simple shaping, and for anyone who wants a sweet handmade gift that looks straight out of a fairy tale. The soft light brown body, textured dark brown cap, and tiny green leaf give it a cozy, natural look, while the jingle bell hidden inside makes a gentle sound that babies love. At about 3 inches (7.5 cm) tall, it's small, squishy, and easy to grab, shake, and cuddle.
Materials Needed
- Yarn: Worsted weight (4) cotton yarn — 30 yds light brown (A), 20 yds dark brown (B), 5 yds green (C)
- Hook: 3.5 mm (E/4)
- Notions: Stitch marker, tapestry needle, scissors, polyester fiberfill, one small jingle bell (about 12–15 mm), sewing pins (optional)
- Finished size: Approx. 3 inches (7.5 cm) tall including cap and stem
Abbreviations
- MR — magic ring: a loop of yarn you work your first stitches into, then pull closed
- sc — single crochet
- inc — increase: work 2 sc into the same stitch
- dec — decrease: work 2 stitches together into 1 sc
- sl st — slip stitch
- ch — chain
- hdc — half double crochet
- dc — double crochet
- sts — stitches
- rnd(s) — round(s)
Gauge
20 sc x 22 rnds = 4 inches (10 cm) in single crochet. To check it, crochet a small flat swatch in sc and measure a 4-inch section; if you have more stitches than 20, go up a hook size, and if you have fewer, go down.
Tips Before You Start
- Work the body in continuous rounds without joining — use a stitch marker to keep track of the first stitch of each round.
- Add the jingle bell after Round 9, before you start decreasing, so it sits safely in the middle of the stuffing.
- Stuff the body firmly but not tightly, so the rattle keeps a round shape and the bell can still jingle.
- Cotton yarn gives crisp stitch definition, which makes the cap texture and leaf stand out nicely.
Step-by-Step Instructions
Body (Color A — Light Brown)
Rnd 1: MR, 6 sc into the ring (6 sts)
Rnd 2: inc in each st around (12 sts)
Rnd 3: [sc, inc] x6 (18 sts)
Rnd 4: [2 sc, inc] x6 (24 sts)
Rnds 5–9: sc in each st around (24 sts)
Insert the jingle bell now, then begin stuffing lightly.
Rnd 10: [2 sc, dec] x6 (18 sts)
Rnd 11: [sc, dec] x6 (12 sts)
Rnd 12: dec x6 (6 sts)
Fasten off, leaving a tail. Add more stuffing if needed, then close the opening by weaving the tail through the front loops of the last 6 sts and pulling tight.
Cap (Color B — Dark Brown)
Rnd 1: MR, 6 sc into the ring (6 sts)
Rnd 2: inc in each st around (12 sts)
Rnd 3: [sc, inc] x6 (18 sts)
Rnd 4: [2 sc, inc] x6 (24 sts)
Rnd 5: [3 sc, inc] x6 (30 sts)
Rnd 6: sl st in each st around (30 sts)
Fasten off, leaving a long tail for sewing. The slip stitch round forms a slightly raised rim.
Leaf (Color C — Green)
Row 1: Ch 6, then sc in the 2nd ch from hook, hdc in the next ch, dc in the next ch, hdc in the next ch, sc in the last ch (5 sts)
Fasten off, leaving a tail for sewing.
Stem (Color B — Dark Brown)
Row 1: Ch 4, then sl st in each ch across (3 sts)
Fasten off, leaving a tail for sewing.
Assembly and Finishing
Thread the cap tail onto a tapestry needle and sew the cap to the top of the body, aligning Round 6 of the cap with Round 1 of the body so the cap sits over the upper portion of the sphere. Sew the leaf to the cap near where the stem will go. Sew the stem upright at the top center of the cap. Weave in all ends securely, especially inside the body near the bell. Lightly steam or mist block the cap and leaf to smooth them, then let everything dry completely before giving the rattle to a baby.
Pro Tips and Variations
- Swap the light brown body for cream or tan for a different woodland look, or use a soft pastel for a more modern nursery palette.
- Make a tiny pair of acorns in different sizes for a matching set — just add one extra increase round to the body for a larger version.
- For extra safety, place the bell inside a small fabric pouch or a tightly closed cotton bag before stuffing, so it stays secure.