Yin-Yang Crochet Gift Card Pouch Free Pattern
Introduction
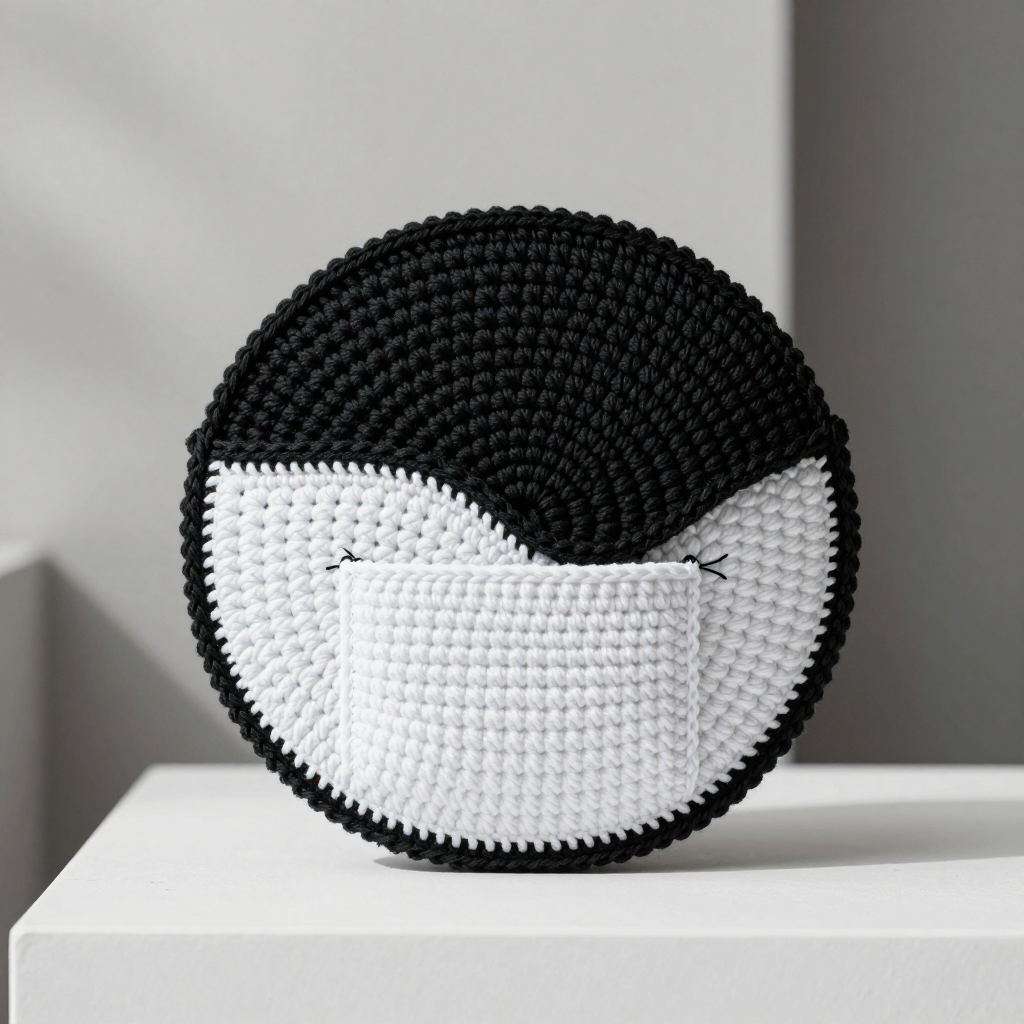
This little pouch is the perfect way to dress up a gift card, and it works up in an evening with just scraps of worsted weight yarn. The front is a bold yin-yang circle made from two half-circles, one black and one white, joined along a straight seam, so it looks striking but stays simple to crochet. A matching black flap folds over the top and snaps shut, hiding the closure inside. Closed, it measures about 4.5 inches across: flat, soft, and just the right size to slip into a card or tuck into a stocking.
Materials Needed
- Yarn: Worsted weight (4) acrylic yarn, approximately 50 yds black and 50 yds white.
- Hook: 4.0 mm (G-6) crochet hook.
- Notions: Tapestry needle, sewing needle and thread, one snap fastener (press stud), scissors, stitch marker (optional).
- Finished size: About 4.5 inches (11.5 cm) in diameter when closed.
Abbreviations
- ch – chain
- sc – single crochet
- inc – increase: work 2 sc in the same stitch
- st(s) – stitch(es)
- R – row or round
- [ ] x6 – repeat the instructions inside the brackets six times
Gauge
16 sc x 18 rows = 4 inches (10 cm) in single crochet. Work a small swatch in sc and measure a 4-inch section; if you have more stitches than 16, go up a hook size, and if you have fewer, go down.
Tips Before You Start
- Keep your tension even on the half-circles so both halves match in size; the black and white pieces must line up exactly along the straight edge.
- Count your stitches at the end of every round. Each round adds 6 stitches, so R10 should always end with 60.
- Leave generous tails (about 12 inches) on every piece; you will use them for seaming and they save you from joining new yarn.
- Work the pocket in a slightly tighter gauge than the front so a gift card slides in snugly without stretching the pouch.
Step-by-Step Instructions
Front Half-Circle (make 2: one black, one white)
R1: Ch 2, 6 sc in 2nd ch from hook (6 sts).
R2: Inc in each st around (12 sts).
R3: [sc, inc] x6 (18 sts).
R4: [2 sc, inc] x6 (24 sts).
R5: [3 sc, inc] x6 (30 sts).
R6: [4 sc, inc] x6 (36 sts).
R7: [5 sc, inc] x6 (42 sts).
R8: [6 sc, inc] x6 (48 sts).
R9: [7 sc, inc] x6 (54 sts).
R10: [8 sc, inc] x6 (60 sts).
Fasten off, leaving a long tail for seaming. Work a second half-circle the same way in the other color.
Join the Halves
Place the black and white half-circles right sides together, aligning their straight edges. Whipstitch or sc the straight edges together using matching yarn. Turn right side out. You now have one flat full circle with a straight yin-yang seam across the middle.
Back Flap
R1: With black, ch 2, 6 sc in 2nd ch from hook (6 sts).
R2: Inc in each st around (12 sts).
R3: [sc, inc] x6 (18 sts).
R4: [2 sc, inc] x6 (24 sts).
R5: [3 sc, inc] x6 (30 sts).
R6: [4 sc, inc] x6 (36 sts).
R7: [5 sc, inc] x6 (42 sts).
R8: [6 sc, inc] x6 (48 sts).
R9: [7 sc, inc] x6 (54 sts).
R10: [8 sc, inc] x6 (60 sts).
Do not fasten off. Ch 1, turn.
R11: Sc in each st across (60 sts).
Fasten off, leaving a long tail for seaming.
R1: With white, ch 21, sc in 2nd ch from hook and each ch across (20 sts).
Rows 2–12: Ch 1, turn, sc in each st across (20 sts).
Fasten off, leaving a long tail.
Assembly
Step 1: Place the joined front circle right side up. Center the pocket on the lower half of the front, aligning the bottom edges. Sew the pocket to the front along its sides and bottom with white yarn, leaving the top open.
Step 2: Place the back flap right side down on top of the front, aligning the straight edges. Sew the two pieces together along the curved edge with black yarn, leaving the straight edge open.
Step 3: Turn the pouch right side out through the opening.
Edging
With black, join yarn at one corner of the opening. Sc evenly around the entire opening edge, working through both layers (about 60 sc). Fasten off and weave in ends.
Closure
Sew one half of the snap fastener to the center inside of the back flap and the matching half to the center inside of the front, positioning them so the flap folds over and snaps closed.
Assembly and Finishing
Weave in all remaining ends on the wrong side, working the tails into the fabric so they don't show through the white half. Lightly block the pouch if desired: mist it, shape it flat into a circle, and let it dry fully before snapping it shut. Check that the pocket opening is snug enough to hold a gift card and adjust with a few extra stitches at the sides if needed.
Pro Tips and Variations
- Swap the colors for a red-and-cream or pastel yin-yang, or use a variegated yarn for one half for a marbled effect.
- Add a small button and loop instead of a snap for a more handmade look, or use a magnetic snap for a cleaner finish.
- Make a slightly larger version by adding one more increase round (R11: [9 sc, inc] x6 = 66 sts) to both the front halves and the flap to fit a small gift card plus a note.