Two-Tone Alpine Pot Wrap Free Crochet Pattern
Introduction
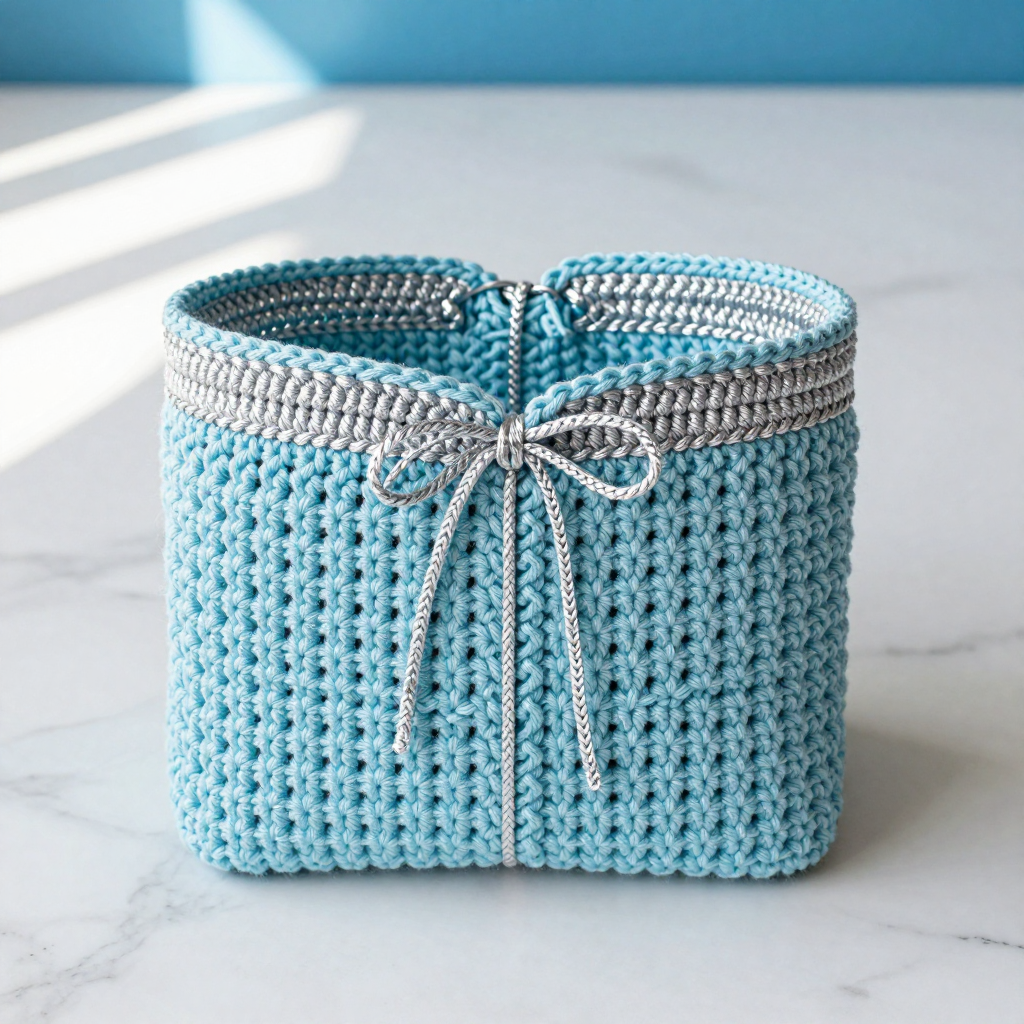
This two-tone alpine pot wrap is the perfect quick project for a plant-loving friend, and it makes a lovely early-Christmas gift that comes together in just a few evenings. Worked flat in one piece from ice blue macrame cord with a silver end block, it has a raised, slightly ribbed alpine-stitch texture that looks far more complicated than it is. Folded around a pot and joined at the back with a simple silver cord tie, it turns an ordinary houseplant into a cozy, mountain-cabin-style decoration. The finished wrap feels sturdy and rustic in the hand, and the silver bow at the back adds just the right touch of shine.
Materials Needed
- Yarn: 3 mm macrame cord (approx. super bulky / #6 weight), cotton. Color A (ice blue): 55 yd. Color B (silver): 20 yd.
- Hook: 6.0 mm (US J-10)
- Notions: Tapestry needle, scissors, stitch markers (optional), a pot 4–5 in (10–13 cm) in diameter and 5 in (13 cm) tall for fitting
- Finished size: Flat rectangle 12 in (30 cm) wide x 6 in (15 cm) tall; folded and joined, it fits a pot 4–5 in (10–13 cm) in diameter and 5 in (13 cm) tall
Abbreviations
- ch – chain: make a loop of yarn and pull it through the loop on your hook.
- dc – double crochet: yarn over, insert hook, pull up a loop, yarn over and pull through two loops, yarn over and pull through the last two loops.
- sc – single crochet: insert hook, pull up a loop, yarn over and pull through both loops.
- fpdc – front-post double crochet: work a double crochet around the post (the vertical body) of the stitch two rows below, from front to back, instead of into the top of a stitch.
- sl st – slip stitch: insert hook, pull up a loop and pull it straight through the loop on your hook.
- rep – repeat
- RS / WS – right side (the outside, textured face) / wrong side (the inside face)
- sts – stitches
Gauge
10 sts x 8 rows = 4 in (10 cm) in alpine stitch, unblocked. To check it, crochet a small swatch in pattern and measure a 4 in (10 cm) section across the middle; adjust your hook size if you have more or fewer stitches than 10.
Tips Before You Start
- Macrame cord has very little stretch, so keep your tension relaxed and even; a slightly loose hand makes the front-post stitches much easier to work.
- The fpdc is always worked around the stitch two rows below, so keep track of which row you are on — a stitch marker at the start of each RS row helps.
- Work the silver block (Rows 12–13) at the end of the panel; this becomes the top front band once the wrap is folded, so check the color change looks neat on the RS.
- Before joining the back, wrap the panel around your pot to check the fit — cord relaxes slightly with handling, so a snug fold is better than a loose one.
Step-by-Step Instructions
Panel (worked flat, RS facing throughout)
Row 1 (RS): With A, ch 31, dc in 4th ch from hook, dc across (28 dc).
Row 2 (WS): Ch 1, sc across (28 sc).
Row 3 (RS, alpine): Ch 2, [fpdc around next dc 2 rows below, dc in next sc] rep across, end fpdc (14 fpdc, 14 dc).
Row 4 (WS): Ch 1, sc across (28 sc).
Row 5 (RS): Ch 2, dc in first sc, [fpdc around next fpdc 2 rows below, dc in next sc] rep across (14 dc, 14 fpdc).
Rows 6–11: Rep Rows 4–5 three times (28 sts each row).
Rows 12–13: Change to B, rep Rows 4–5 once (28 sts). Fasten off B, weave in ends.
Edging
Rnd 1: With A, join to any corner, ch 1, sc evenly around the entire rectangle (approx. 3 sc per 1 in along the sides, 1 sc per st along top and bottom), 3 sc in each corner, sl st to first sc. Fasten off and weave in ends.
Tie
Row 1: With B, ch 60, sl st in 2nd ch from hook and each ch across (59 sl st). Fasten off and weave in ends.
Assembly and Finishing
Fold the panel in half widthwise with the RS facing out, so the silver block sits at the top front. Using A and a tapestry needle (whipstitch) or your hook (sl st), join the two short back edges from the bottom up 4 in (10 cm), leaving the top 2 in (5 cm) open at the back. Thread the silver B tie through the top open edges at the back and knot the ends so it cannot pull out. Weave in any remaining ends neatly on the WS. Lightly steam or mist and pat the wrap into shape to settle the alpine texture — do not stretch it, as the cord holds its shape. Slip the pot inside, cinch the tie, and finish with a bow at the back.
Pro Tips and Variations
- Swap the silver block for a contrasting color like deep forest green or cream to match a different plant pot or room palette.
- Make a taller version by adding more alpine repeat rows before the color change — each extra pair of rows adds about 1 in (2.5 cm) of height.
- For a sturdier tie, work the slip-stitch cord in a double strand of silver cord, or add a small bead to each end of the tie for a decorative finish.