Mesa Hand Towel Hanger Crochet Free Pattern
Introduction
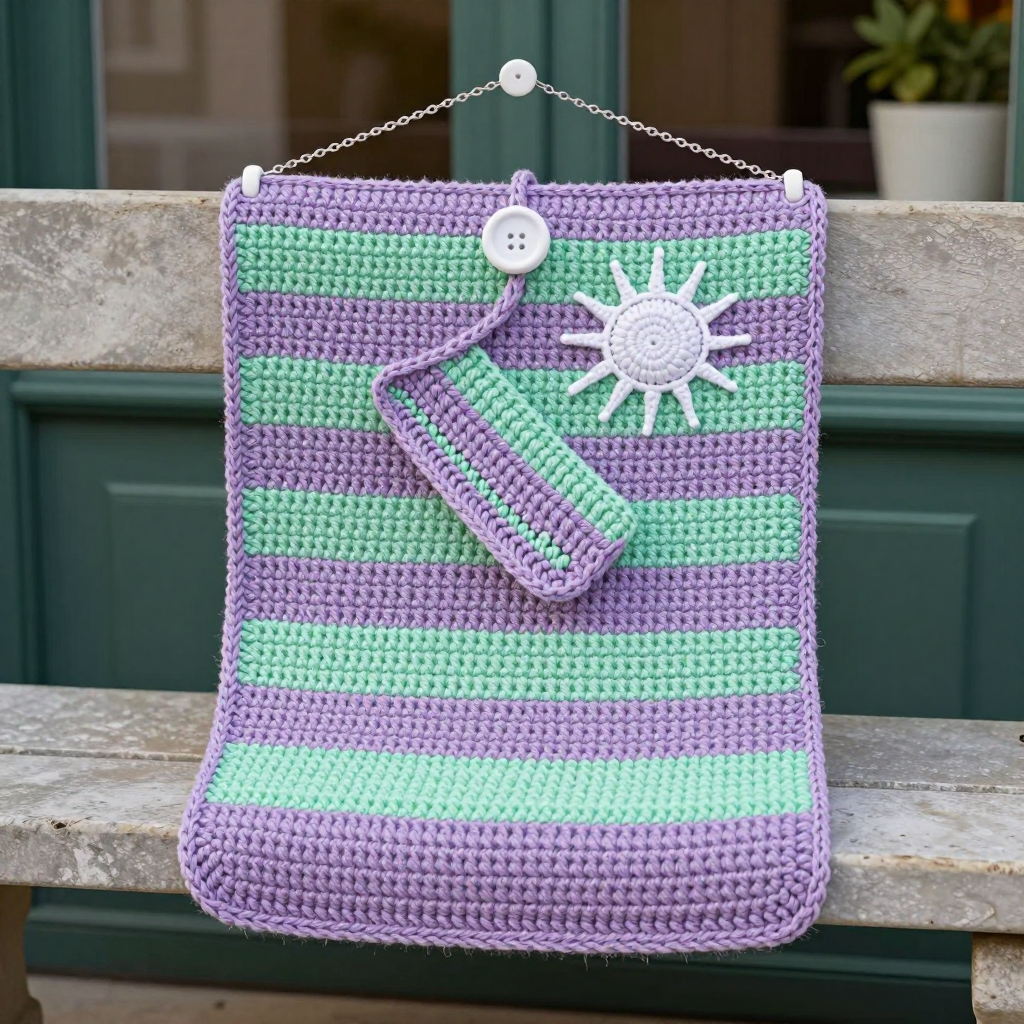
The Mesa Hand Towel Hanger is a small, satisfying project that brings a little desert boho charm to your bathroom. It's designed for advanced beginners who are comfortable with single crochet and simple shaping, and it works up quickly in soft DK cotton. The flat rectangular body is worked in four calm stripes of lavender and mint, then dressed up with a little mesa landscape appliqué and a hand-embroidered sun. It feels smooth and sturdy in the hand, hangs neatly over a towel bar or hook, and makes a thoughtful handmade gift.
Materials Needed
- Yarn: DK weight (3) cotton yarn — 50 yds lavender (A), 30 yds mint (B), 10 yds white (C)
- Hook: 4.0 mm (G/6)
- Notions: yarn needle, scissors, small amount of polyester fiberfill for the button, stitch marker (optional)
- Finished size: 6 inches wide x 8 inches long (excluding button loop)
Abbreviations
- ch — chain
- sc — single crochet
- sl st — slip stitch
- sc2tog — single crochet two stitches together (a decrease)
- st(s) — stitch(es)
- Rnd — round
Gauge
18 sts x 20 rows = 4 inches in single crochet. Work a small swatch in sc and measure a 4-inch section; if you have more stitches, go up a hook size, and if you have fewer, go down.
Tips Before You Start
- Keep your turning chains loose so the side edges of the body stay straight and even.
- Change colors on the last stitch of the row before the new color begins, so the stripe line looks clean.
- Pin the mesa appliqué in place before sewing so the bottom edge sits exactly at Row 20.
- Stuff the button only lightly — too much filling makes it puffy and hard to fasten through the loop.
Step-by-Step Instructions
Body
Worked in color A unless noted.
Row 1: Ch 28, sc in 2nd ch from hook and each ch across (27 sts).
Rows 2–10: Ch 1, turn, sc in each st across (27 sts).
Change to B.
Rows 11–20: Ch 1, turn, sc in each st across (27 sts).
Change to A.
Rows 21–30: Ch 1, turn, sc in each st across (27 sts).
Change to B.
Rows 31–40: Ch 1, turn, sc in each st across (27 sts). Do not fasten off.
Button Loop
Loop: Ch 10, sl st to first ch to form a loop, fasten off.
Button
Worked with C in the round.
Rnd 1: Make a magic ring, 6 sc in ring, join with sl st (6 sts).
Rnd 2: Ch 1, 2 sc in each st around, join (12 sts).
Rnd 3: Ch 1, [sc, 2 sc in next st] around, join (18 sts).
Rnd 4: Ch 1, sc in each st around, join (18 sts).
Stuff lightly.
Rnd 5: Ch 1, [sc, sc2tog] around, join (12 sts).
Rnd 6: Ch 1, sc2tog around, join (6 sts). Fasten off, leaving a tail.
Sew the button to the center of Rows 5–6 of the Body.
Mesa Appliqué
Worked with A.
Row 1: Ch 12, sc in 2nd ch from hook and each ch across (11 sts).
Row 2: Ch 1, turn, sc2tog, sc in next 7 sts, sc2tog (9 sts).
Row 3: Ch 1, turn, sc2tog, sc in next 5 sts, sc2tog (7 sts).
Row 4: Ch 1, turn, sc2tog, sc in next 3 sts, sc2tog (5 sts).
Row 5: Ch 1, turn, sc2tog, sc in next 1 st, sc2tog (3 sts). Fasten off.
Stripe: With B, work surface slip stitch along Row 2 of the mesa.
Sun: With C, embroider a small sun using 6 straight stitches arranged in a circle at the top right of the mesa.
Sew the mesa appliqué to the center of the Body, aligning the bottom of the mesa with Row 20.
Assembly and Finishing
Weave in all ends on the wrong side, working each tail through a few stitches before trimming. Sew the button firmly to the center of Rows 5–6 of the Body, then check that the button loop at the top reaches it comfortably. Pin and sew the mesa appliqué in place as described, and secure the sun embroidery ends on the back of the appliqué. Block the finished hanger by misting it lightly and pinning it flat to the finished measurements (6 x 8 inches); let it dry completely before hanging.
Pro Tips and Variations
- Swap the stripe colors for any two shades you love — sage and cream give a softer, neutral look.
- Add a second row of surface slip stitch in C along the bottom of the mesa for a layered sunset effect.
- For a wider hanger, add 6 chains to the starting chain and work the same number of rows; adjust the appliqué placement to stay centered.


