Little Horned Monster Plush Crochet Free Pattern
Introduction
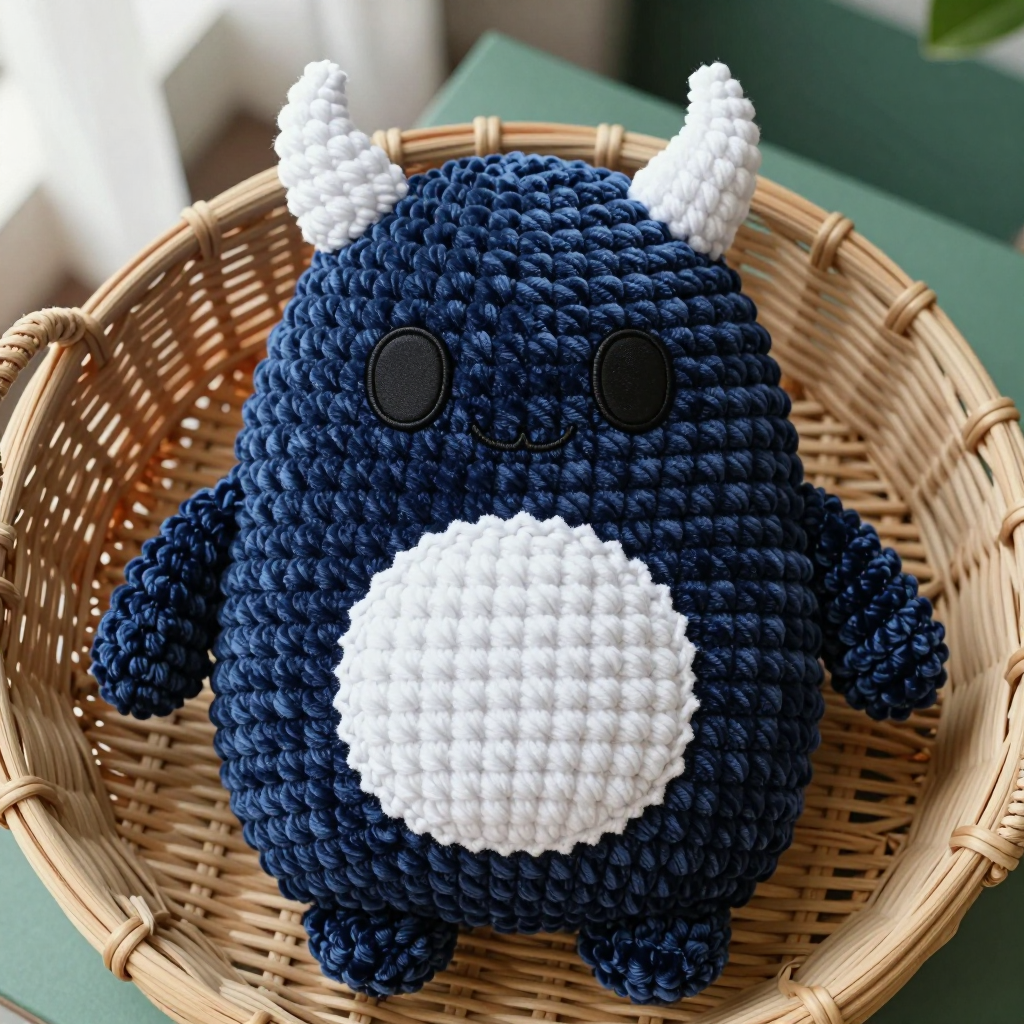
Meet the Little Horned Monster, a squishy, egg-shaped plush that looks like it wandered out of a friendly folk tale. It's a wonderful first amigurumi project: the body is one simple piece worked in continuous rounds, and the personality comes from easy surface details rather than complicated shaping. Worked in navy velvet chenille with a white belly patch, two tiny horns and stitched eyes, it feels cloud-soft and looks charming on a shelf, a bed or in a child's arms. If you can single crochet and make a magic ring, you can make this monster.
Materials Needed
- Yarn: Super bulky (6) velvet/chenille yarn, polyester. Color A (navy): approx 120 yd. Color B (white): approx 25 yd. Color C (black): small amount for eyes and mouth.
- Hook: 6.0 mm (US J-10).
- Notions: Stitch marker, tapestry needle, polyester fiberfill, scissors, pins.
- Finished size: Approx 10 in (25 cm) tall x 8 in (20 cm) wide.
Abbreviations
- MR: magic ring — an adjustable loop you crochet into to start in the round.
- ch: chain.
- sc: single crochet.
- inc: increase — work 2 sc in the same stitch.
- dec: decrease — work 2 stitches together into 1.
- sts: stitches.
- FO: fasten off.
Gauge
8 sc x 9 rnds = 4 in (10 cm) in continuous sc. Crochet a small swatch in the round and measure the middle of it; if you have more stitches than 8 per 4 in, go up a hook size, and if you have fewer, go down.
Tips Before You Start
- Velvet chenille yarn hides stitches, so trust your stitch marker and count every round rather than hunting for the stitch by eye.
- Work in continuous spirals without joining rounds; move your marker to the first stitch of each new round.
- Stuff firmly as you go, especially before the final decrease rounds, so the egg holds its shape.
- Keep your tension even and slightly relaxed — tight chenille stitches are hard to see and can snap the yarn.
Step-by-Step Instructions
Body (Color A)
Rnd 1: MR, 6 sc (6 sts).
Rnd 2: inc x6 (12 sts).
Rnd 3: [sc, inc] x6 (18 sts).
Rnd 4: [2 sc, inc] x6 (24 sts).
Rnd 5: [3 sc, inc] x6 (30 sts).
Rnd 6: [4 sc, inc] x6 (36 sts).
Rnds 7-16: sc in each st around (36 sts).
Rnd 17: [4 sc, dec] x6 (30 sts).
Rnd 18: [3 sc, dec] x6 (24 sts).
Rnd 19: [2 sc, dec] x6 (18 sts). Stuff firmly.
Rnd 20: [sc, dec] x6 (12 sts).
Rnd 21: dec x6 (6 sts). FO, cinch the opening closed.
Belly Patch (Color B)
Worked flat. Ch 7.
Row 1: sc in 2nd ch from hook, 4 sc, 3 sc in last ch, turn work, 4 sc, 2 sc in last ch (14 sts).
Row 2: inc, 4 sc, inc x3, 4 sc, inc x2 (20 sts).
Row 3: sc, inc, 4 sc, [sc, inc] x3, 4 sc, [sc, inc] x2 (26 sts). FO leaving an 18 in tail. Pin centered on the front of the Body and whipstitch in place with B.
Horns (make 2, Color B)
Rnd 1: MR, 4 sc (4 sts).
Rnd 2: [sc, inc] x2 (6 sts).
Rnd 3: sc in each st around (6 sts).
Rnd 4: [sc, inc] x3 (9 sts).
Rnd 5: sc in each st around (9 sts). Lightly stuff. FO leaving an 8 in tail. Sew to the top of the Body approx 2.5 in apart, tips angled outward.
Eyes (Color C)
With C and the tapestry needle, embroider 2 satin-stitch ovals approx 0.5 in wide x 0.75 in tall on the front of the Body above the Belly Patch, 2 in apart. Knot on the inside and weave the ends in.
Mouth (Color C)
Embroider a small straight-stitch curve approx 1.5 in wide below the eyes.
Assembly and Finishing
The Body is already closed and stuffed, so assembly is just the surface pieces: pin the Belly Patch centered on the front and whipstitch all the way around with B, then sew the Horns to the top of the Body, checking they sit evenly before you knot off. Weave in every end on the inside, using the tapestry needle to bury the tails in the stuffing. No blocking is needed for chenille — instead, gently fluff the velvet nap with your fingers to blend the seams and raise the fuzz.
Pro Tips and Variations
- Swap the navy for forest green or plum and the white for cream for a different folk-art palette.
- Add a small crocheted or felt heart on the belly patch for a sweet Valentine version.
- Make a mini version by holding two strands of DK velvet together and following the same rounds for a palm-sized monster.