Coastal Slouch Beret Free Crochet Pattern
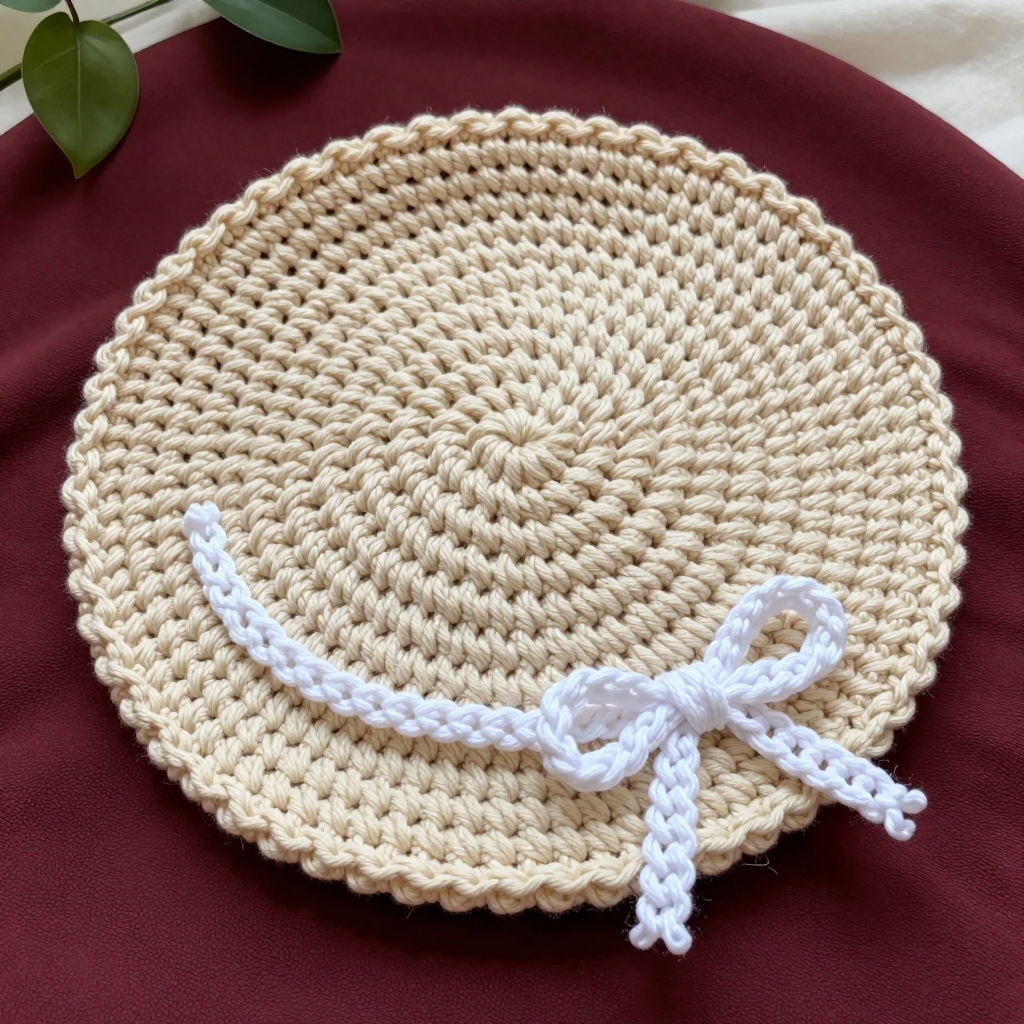
Coastal Slouch Beret Free Crochet Pattern
Introduction
The Coastal Slouch Beret is a soft, relaxed hat designed for anyone who wants an easy, satisfying project with a polished finish. It is a wonderful choice for confident beginners, since the whole hat is worked in single crochet and only one increase round is repeated to build the crown. Crocheted in creamy, rope-like bulky cotton, it has a gentle structure that holds its slouch without feeling stiff. The flat circular crown flows into a straight-sided body, then finishes with a slightly ridged band and a small white bow at the side for a breezy, coastal touch.
Materials Needed
- Yarn: Bulky (weight 5) rope-style cotton, 100% cotton, 120 yd (110 m) per 100 g skein. Color A (cream): 2 skeins (about 200 yd / 180 m). Color B (white): small amount, about 5 yd (5 m) for the bow.
- Hook: 6.0 mm (US J/10) crochet hook.
- Notions: Stitch marker, tapestry needle, scissors, tape measure.
- Finished size: Adult, circumference 22 inches (56 cm), height 9 inches (23 cm) including the band.
Abbreviations
- ch – chain: make a loop of yarn and pull it through the loop on the hook.
- sc – single crochet: insert hook, yarn over, pull up a loop, yarn over, pull through both loops.
- inc – increase: work 2 single crochet stitches into the same stitch.
- sl st – slip stitch: insert hook, yarn over, pull through both the stitch and the loop on the hook.
- MR – magic ring: an adjustable loop used to begin working in the round.
- blo – back loop only: work into the back loop of each stitch, leaving the front loop free.
- rnd(s) – round(s): one complete circuit of stitches worked in the round.
- sts – stitches.
Gauge
12 single crochet stitches and 12 rounds = 4 inches (10 cm). To check, crochet a small flat swatch in single crochet, measure a 4-inch section, and adjust your hook size if your stitch count differs.
Tips Before You Start
- Use a stitch marker in the first stitch of each round so you never lose your place, since the hat is worked in a continuous spiral.
- Keep your tension relaxed and even; bulky cotton shows tight stitches, and a loose, consistent hand gives the beret its soft drape.
- Count your stitches at the end of every increase round — each round should grow by exactly 6 stitches.
- When you reach the band, work only into the back loop of each stitch to create the ridged edge.
Step-by-Step Instructions
Crown (Color A)
Rnd 1: Make a magic ring, work 6 sc into the ring (6 sts).
Rnd 2: Inc in each st around (12 sts).
Rnd 3: [sc, inc] x6 (18 sts).
Rnd 4: [2 sc, inc] x6 (24 sts).
Rnd 5: [3 sc, inc] x6 (30 sts).
Rnd 6: [4 sc, inc] x6 (36 sts).
Rnd 7: [5 sc, inc] x6 (42 sts).
Rnd 8: [6 sc, inc] x6 (48 sts).
Rnd 9: [7 sc, inc] x6 (54 sts).
Rnd 10: [8 sc, inc] x6 (60 sts).
Rnd 11: [9 sc, inc] x6 (66 sts).
Rnd 12: [10 sc, inc] x6 (72 sts).
Rnds 13-24: sc in each st around (72 sts). Do not fasten off.
Band (Color A)
Rnds 25-28: sc in blo of each st around (72 sts). Fasten off.
Bow (Color B)
Row 1: Ch 12, sl st in 2nd ch from hook and in each ch across (11 sts). Fasten off, leaving a long tail.
Finishing the bow: Wrap the long tail tightly around the center of the strip several times to pinch it into a bow shape, then secure the tail on the back.
Assembly and Finishing
Thread the bow's remaining tail onto a tapestry needle and stitch the bow firmly to the side of the band, just above the bottom edge. Weave in all ends on the inside of the hat, working each end through several stitches in different directions so it stays secure. Block the beret by misting it lightly with water, shaping the crown gently with your hands, and letting it dry flat; this smooths the stitches and helps the slouch hold its shape.
Pro Tips and Variations
- For a deeper, floppier slouch, add 2-4 extra straight rounds at 72 sts before starting the band.
- Swap the white bow for a contrasting color, or make a wider 16-chain bow for a bolder accent.
- Work the band in a contrasting color, or add a round of slip stitch along the bottom edge for a neat, crisp finish.


