Braided Band Linen Pouf Knit Free Pattern
Introduction
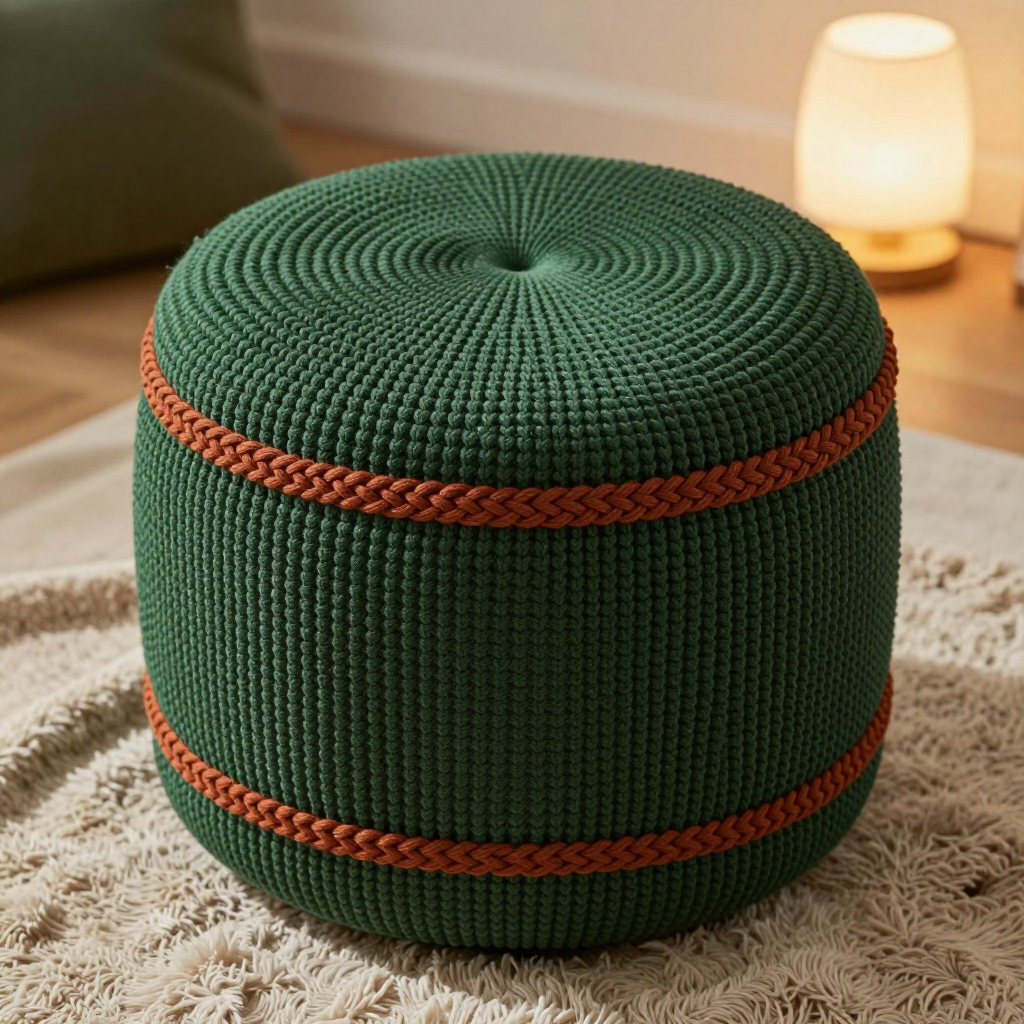
This Braided Band Linen Pouf is a cozy, folk-art inspired floor cushion that looks far more complicated than it really is. It's written for advanced beginners who are comfortable knitting in the round and can follow simple decreases, and it comes together from three easy pieces: two flat discs and a straight side tube. The forest green velvet yarn worked in linen stitch gives the fabric a dense, slightly nubby texture that feels soft underfoot, while two raised rust braided cords wrap around the sides for a warm pop of color. At about 20 inches across and 12 inches high, it's a sturdy, huggable pouf that works as a footrest, a spare seat, or a statement piece in any room.
Materials Needed
- Yarn: Worsted weight velvet yarn (100% polyester, approx. 150 yds/100g). Main Color (MC) Forest Green: 600 yds. Contrast Color (CC) Rust: 80 yds.
- Needles: 5.5 mm (US 9) circular needles, 24" or longer, plus a set of 5 double-pointed needles (dpns) in the same size for small circumferences.
- Notions: Stitch markers, stitch holder or scrap yarn, tapestry needle, fiberfill stuffing, scissors.
- Finished size: Approx. 20" diameter x 12" high.
Abbreviations
- CO: cast on
- st(s): stitch(es)
- MC: main color (Forest Green)
- CC: contrast color (Rust)
- k: knit
- p: purl
- sl1 wyif: slip 1 stitch purlwise with the yarn held in front of the work
- k2tog: knit 2 stitches together (a one-stitch decrease)
- pm: place marker
- RS: right side
- rem: remaining
- Rnd/R: round/row
Gauge
16 sts and 32 rows = 4" in linen stitch pattern. Knit a small swatch in the round in linen stitch and measure a 4" section; if you have more stitches than 16, go up a needle size, and if you have fewer, go down.
Tips Before You Start
- Velvet yarn can shed and slip, so keep your tension relaxed and avoid tugging the yarn tightly as you work.
- Always keep the slipped stitch yarn in front (wyif) on both pattern rows; this is what creates the woven linen texture.
- Because the discs are worked in the round, use the magic-loop method or switch to dpns as the stitch count shrinks near the center.
- Stuff the pouf firmly but evenly before closing the final seam so it holds its drum shape.
Step-by-Step Instructions
Top Disc (MC)
With circular needle, CO 80 sts. Join to work in the round, pm.
R1 (RS): [k1, sl1 wyif] around (80 sts).
R2: [sl1 wyif, p1] around (80 sts).
R3-24: Repeat R1-2 until piece measures 3" from CO, ending after R2 (80 sts).
Shape R1: [k1, sl1 wyif] 10 times, k2tog, [k1, sl1 wyif] 10 times, k2tog, [k1, sl1 wyif] 10 times, k2tog, [k1, sl1 wyif] 10 times, k2tog (76 sts).
Shape R2: [sl1 wyif, p1] around (76 sts).
Shape R3: [k1, sl1 wyif] 9 times, k2tog, [k1, sl1 wyif] 9 times, k2tog, [k1, sl1 wyif] 9 times, k2tog, [k1, sl1 wyif] 9 times, k2tog (72 sts).
Shape R4: [sl1 wyif, p1] around (72 sts).
Continue decreasing 4 sts every RS row as set, working one fewer repeat before each decrease, until 8 sts rem. Break yarn, thread through rem sts, pull tight. Set aside.
Bottom Disc (MC)
Work exactly as for the Top Disc.
Side Tube (MC)
With circular needle, CO 80 sts. Join to work in the round, pm.
R1 (RS): [k1, sl1 wyif] around (80 sts).
R2: [sl1 wyif, p1] around (80 sts).
R3-48: Repeat R1-2 until piece measures 6" from CO, ending after R2 (80 sts). Do not bind off. Place live sts on holder.
Braided Cord (CC, make 2)
With CC, CO 3 sts. Work I-cord for 60". Bind off. Make second cord.
Assembly and Finishing
With RS together, join the live sts of the side tube to the CO edge of the top disc using a three-needle bind-off. Repeat for the bottom disc. Turn the pouf RS out and stuff firmly with fiberfill. Mark two horizontal lines around the side tube, one 3" from the top and one 3" from the bottom. Starting at a seam, wrap the first braided cord around the pouf at the upper mark, overlapping the ends by 2". Sew the ends securely with matching yarn. Repeat for the lower mark with the second cord. Weave in all ends. Block lightly by misting with water and shaping by hand; do not press the velvet with a hot iron.
Pro Tips and Variations
- Swap the rust cords for a mustard or cream velvet to change the folk-art palette without altering the pattern.
- Add a third braided band at the center of the side tube for a bolder, more graphic look.
- Use a smooth worsted cotton instead of velvet for an easy-care, outdoor-friendly version that shows the linen stitch texture more crisply.