Art Deco Fan Book Sleeve Crochet Free Pattern
Introduction
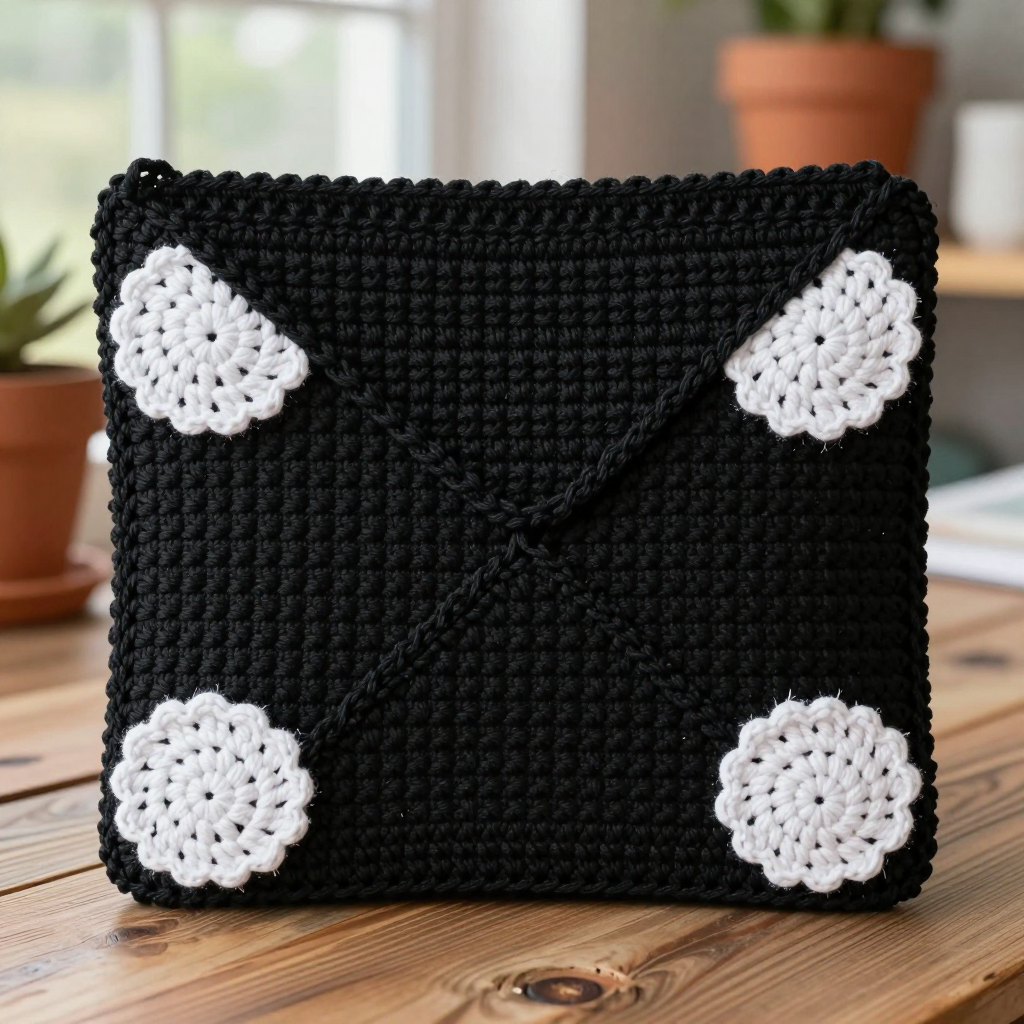
This Art Deco Fan Book Sleeve is the perfect project for anyone who loves a good book as much as a good stitch. The body is worked in alpine stitch, a beautifully textured pattern of raised front-post columns that looks far more complicated than it actually is, so even newer crocheters can master it quickly. The finished pouch is a simple folded rectangle, seamed into an envelope shape that slips over your paperback or tablet to keep it safe in your bag. With its bold black body and crisp white fan-shaped corners, it has a glamorous, vintage feel that makes a lovely handmade gift for a reader in your life.
Materials Needed
- Yarn: Bulky weight (weight category 5) wool, approximately 200 yards total: 150 yards black (Color A) and 50 yards white (Color B).
- Hook: 6.0 mm (US J-10) crochet hook.
- Notions: Tapestry needle, scissors, stitch markers, measuring tape.
- Finished size: Approximately 9 inches wide by 12 inches tall (23 cm x 30.5 cm) before folding; folds to about 9 inches wide by 6 inches tall. Fits most books up to 8 x 10 inches.
Abbreviations
- ch – chain: make a loop of yarn and pull it through the loop on your hook.
- st / sts – stitch / stitches.
- sl st – slip stitch: insert hook, yarn over, pull through both the stitch and the loop on your hook.
- sc – single crochet: insert hook, yarn over, pull up a loop, yarn over, pull through both loops.
- dc – double crochet: yarn over, insert hook, pull up a loop, yarn over, pull through two loops, yarn over, pull through remaining two loops.
- fpdc – front post double crochet: work a double crochet around the post of the stitch below, from front to back, instead of into the top of the stitch.
- inc – increase: work 2 single crochet stitches into the same stitch.
- MR – magic ring: an adjustable loop used to start working in the round.
- sp / sps – space / spaces.
Gauge
12 stitches and 8 rows = 4 inches (10 cm) in alpine stitch pattern. To check, crochet a small swatch and measure a 4-inch section; adjust your hook size if your stitches are too tight or too loose.
Tips Before You Start
- Alpine stitch is built on front post double crochet, so keep your tension relaxed on the raised columns; pulling them too tight makes the fabric stiff and narrow.
- Count your stitches at the end of every row. The rectangle must stay 26 stitches wide to fold into the correct pouch size.
- Use a stitch marker at the first stitch of each row so you never lose your place in the repeat.
- Block the finished rectangle before seaming so the sides lie flat and the pouch folds evenly.
Step-by-Step Instructions
Main Rectangle (Color A)
Row 1: Ch 28, dc in 4th ch from hook and in each ch across (26 sts).
Row 2: Ch 2, turn, [fpdc around next st, dc in next st] across, ending with dc (26 sts).
Row 3: Ch 2, turn, dc in each st across (26 sts).
Rows 4-24: Repeat Rows 2-3, ending on a Row 2 repeat (12 pattern rows total) (26 sts).
Fasten off. Rectangle measures approximately 9 inches wide by 12 inches tall.
Fan Appliqué (Color B) – make 4
Rnd 1: MR, 6 sc into ring, join with sl st (6 sts).
Rnd 2: Ch 1, inc in each st around, join with sl st (12 sts).
Rnd 3: Ch 1, [sc, inc] x6, join with sl st (18 sts).
Rnd 4: Ch 1, [sc, ch 2, sc] in each st around, join with sl st (36 sts, 18 ch-2 sps).
Fasten off, leaving a long tail for sewing.
Assembly
Fold the rectangle in half widthwise to form a 9 inch by 6 inch pouch. Whipstitch the two side seams with Color A, leaving the top edge open. Attach one fan to each front corner (2 fans) and one to each back corner (2 fans) using Color B and a tapestry needle, positioning the fans so they overlap the side seam and point inward toward the center.
Edging
Rnd 1: With Color A, join yarn at top right corner. Sc evenly around the top opening, working 1 sc in each st and 2 sc in each corner. Join with sl st. Fasten off.
Assembly and Finishing
Weave in all ends on the wrong side of the work, using the tapestry needle to hide them inside the fabric. Gently block the finished pouch by misting it with water and shaping it flat, then allow it to dry completely before use. Check that the side seams are secure and that each fan sits flat against the corners.
Pro Tips and Variations
- Swap the white fans for a metallic or pastel shade to change the mood of the piece while keeping the Art Deco look.
- Add a button and a small chain loop at the top opening to keep the sleeve closed in your bag.
- Work the fans in the same color as the body for a subtle, textured finish, or use a contrasting border on the top edging for extra polish.