Two-Tone Deco Fan Lap Throw - Free Crochet Pattern
Introduction
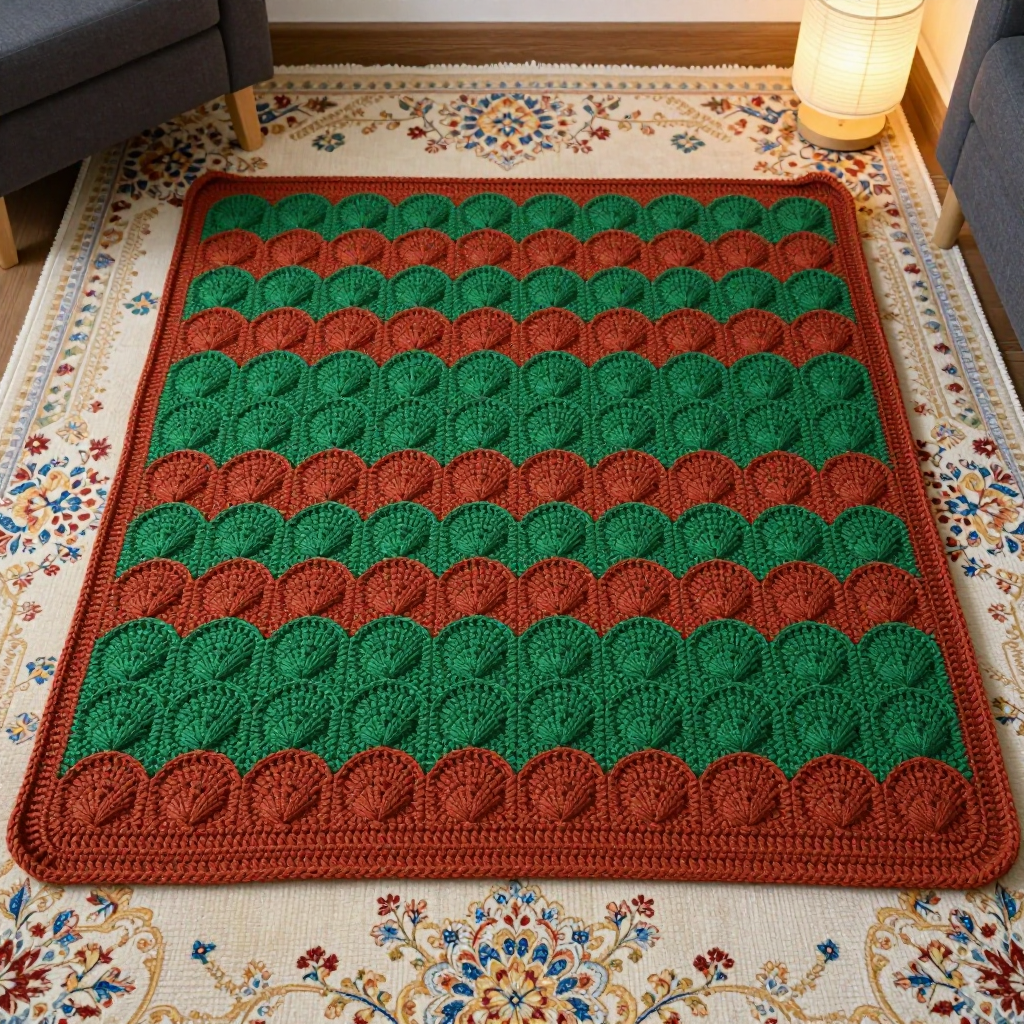
This Two-Tone Deco Fan Lap Throw is the perfect project for anyone who has mastered the basics and is ready to add a little texture to their crochet. Worked in soft, breathable worsted weight cotton, it drapes beautifully over a sofa or chair and feels cool and comfortable across your lap. Wide vertical color blocks of forest green and rust alternate in a repeating shell stitch, creating art deco fan motifs that look far more intricate than they are. With simple two-row repeats and just two colors, this advanced beginner pattern is relaxing to make and stunning to give.
Materials Needed
- Yarn: Worsted weight (category 4) cotton, approximately 1000 yards total: 600 yards forest green (A) and 400 yards rust (B)
- Hook: 5.5 mm (I-9) crochet hook
- Notions: Tapestry needle for weaving in ends, scissors, stitch markers (optional)
- Finished size: Approximately 36 inches wide x 48 inches long, including edging
Abbreviations
- ch – chain: yarn over and pull through the loop on your hook
- sc – single crochet: insert hook, yarn over, pull up a loop, yarn over, pull through both loops
- dc – double crochet: yarn over, insert hook, pull up a loop, yarn over and pull through two loops twice
- sl st – slip stitch: insert hook, yarn over, pull through both the stitch and the loop on your hook
- st(s) – stitch(es)
- sp – space
- RS – right side (the front of the fabric)
- shell – 5 dc worked into the same stitch
- rep – repeat
Gauge
One shell (5 dc) plus one sc measures 2 inches wide, and 4 rows measure 2 inches in pattern. To check, crochet a small swatch in pattern and measure across several shells and up several rows; adjust your hook size if needed to match.
Tips Before You Start
- Count your shells at the end of every row. Each row should have exactly 15 shells and 16 sc, so a quick count catches mistakes before they grow.
- Change colors at the end of the last row of each band by finishing the final stitch with the new color, so the color change sits cleanly at the edge.
- Keep your turning chains consistent and work the first and last stitches of each row into the correct stitches so the side edges stay straight for the edging.
- Cotton has little stretch, so keep your tension relaxed and even; a slightly looser hand makes the shells pop and the blanket softer.
Step-by-Step Instructions
The throw is worked flat in rows, turning at the end of each row. Shell = 5 dc in same st.
Blanket Body
Setup: With A, ch 92.
Row 1 (RS): Sc in 2nd ch from hook, *skip 2 ch, shell in next ch, skip 2 ch, sc in next ch; rep from * across, ending with sc in last ch. (15 shells, 16 sc)
Row 2: Ch 3 (counts as first dc), turn, 2 dc in first sc, *sc in center dc of next shell, shell in next sc; rep from * across, ending with 3 dc in last sc. (15 shells, 16 sc)
Rows 3-12: Rep Row 2. (15 shells, 16 sc)
Change to B.
Rows 13-24: Rep Row 2. (15 shells, 16 sc)
Change to A.
Rows 25-36: Rep Row 2. (15 shells, 16 sc)
Change to B.
Rows 37-48: Rep Row 2. (15 shells, 16 sc)
Change to A.
Rows 49-60: Rep Row 2. (15 shells, 16 sc)
Change to B.
Rows 61-72: Rep Row 2. (15 shells, 16 sc)
Change to A.
Rows 73-84: Rep Row 2. (15 shells, 16 sc)
Change to B.
Rows 85-96: Rep Row 2. (15 shells, 16 sc)
Do not fasten off.
Edging
Rnd 1: With B, ch 1, turn to work along side edge, sc evenly along side edge (approx 96 sc), ch 1, turn to work along bottom edge, sc in each ch and shell across (92 sc), ch 1, turn to work along other side edge, sc evenly (approx 96 sc), ch 1, turn to work along top edge, sc in each st across (92 sc), join with sl st to first sc. (approx 376 sc)
Rnd 2: Ch 1, sc in each sc around, join with sl st to first sc. Fasten off.
Assembly and Finishing
This throw is worked in one piece, so no seaming is required. Weave in all ends along the edges, working them into the stitches in matching colors so they disappear. Block lightly by misting the blanket with water, smoothing it to the finished measurements of 36 inches wide by 48 inches long, and letting it dry flat. Light blocking opens the shells and evens out the color bands for a polished finish.
Pro Tips and Variations
- Swap the color order or choose a different pair of contrasting colors to match your room; the wide bands look striking in any two-color combination.
- For a larger throw, add extra 12-row color bands in the same repeat, keeping the shell count the same across each row.
- Work the edging in a third color, or add a third round of shells in the edging for a more decorative border.