Sunburst Pocket Waffle Crochet Cardigan Free Pattern
Introduction
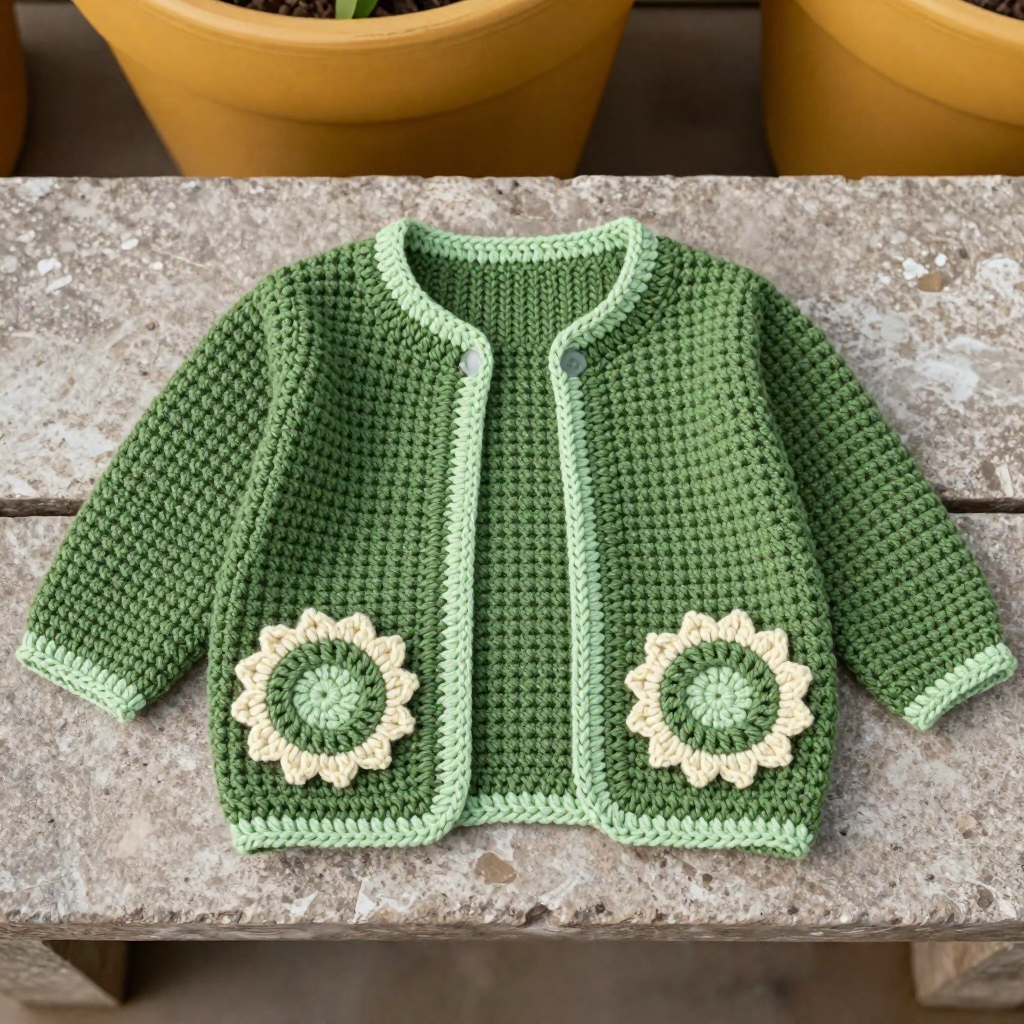
This little cardigan is made for brand-new babies and the grown-ups who love to wrap them up warm. Worked in plush super bulky chenille, it uses a simple waffle stitch that creates a soft, bumpy grid of texture you can see and feel. The moss green body is trimmed with lichen green edging and finished with two circular sunburst pockets in two shades of green, giving it a cozy Nordic-inspired look. It is a quick, satisfying project that is gentle on beginners and lovely to give as a gift.
Materials Needed
- Yarn: Super bulky (6) chenille plush yarn, 100% polyester, approx. 100 yds (92 m) per 100 g skein.
- Color A (moss green): 200 yds
- Color B (lichen green): 50 yds
- Color C (pale lichen): 20 yds
- Hook: 6.0 mm (J-10) crochet hook
- Notions: Tapestry needle, stitch markers, scissors, tape measure
- Finished size: Chest circumference 20 inches (51 cm), length 10 inches (25 cm), sleeve length 6 inches (15 cm). Fits newborn 0–3 months.
Abbreviations
- ch – chain
- sc – single crochet
- dc – double crochet
- FPdc – front post double crochet (work the dc around the post of the stitch below, from the front, instead of into the top of the stitch)
- inc – increase (work 2 sc in the same stitch)
- MR – magic ring
- st(s) – stitch(es)
- rep – repeat
- Rnd – round
Gauge
8 sts and 8 rows = 4 inches (10 cm) in waffle stitch pattern. Work a small swatch in pattern and measure a 4-inch square; adjust your hook size if needed to match.
Tips Before You Start
- Chenille yarn can shed and is hard to unravel, so count your stitches often and keep your tension relaxed and even.
- Use stitch markers to mark the first and last 2 dc of each front piece so your border edges stay straight.
- Keep your FPdc posts loose enough to sit on the surface; pulling them tight flattens the waffle texture.
- Work the pockets first so you can place them on the fronts before seaming.
Step-by-Step Instructions
Back
With A, ch 42.
Row 1: Dc in 4th ch from hook and in each ch across (40 dc). Turn.
Row 2: Ch 3 (counts as first dc), dc in next st, *FPdc around next st, dc in next 2 sts; rep from * across, ending with FPdc around last st, dc in last st. Turn.
Row 3: Ch 3, dc in next st, *dc in next st, FPdc around next st, dc in next st; rep from * across, ending with dc in last 2 sts. Turn.
Rows 4–20: Rep Rows 2–3 for pattern, maintaining waffle stitch (alternating FPdc and dc groups) (40 sts). Fasten off.
Left Front
With A, ch 22.
Row 1: Dc in 4th ch from hook and in each ch across (20 dc). Turn.
Rows 2–20: Work in waffle stitch pattern same as back, keeping 2 dc at each edge for border (20 sts). Fasten off.
Right Front
Work same as left front, but mirror the waffle pattern placement (start with dc in next st, FPdc around next st, etc.) to maintain symmetry (20 sts). Fasten off.
Sleeves (make 2)
With A, ch 26.
Row 1: Dc in 4th ch from hook and in each ch across (24 dc). Turn.
Rows 2–12: Work in waffle stitch pattern (24 sts). Fasten off.
Sunburst Pockets (make 2)
With B, MR 6 sc.
Rnd 1: Inc in each st around (12 sc).
Rnd 2: [Sc, inc] x6 (18 sc).
Rnd 3: [Sc, inc] x9 (27 sc). Change to C.
Rnd 4: Sc in each st around (27 sc). Fasten off, leaving a long tail for sewing.
Assembly
Sew shoulder seams: join front and back pieces at top edges, leaving center 12 sts open for neck.
Sew sleeves to armholes: align sleeve top with armhole edges and sew in place.
Sew side and sleeve seams: fold cardigan in half and sew from underarm to bottom edge and along sleeve length.
Attach pockets: position sunburst pockets on front pieces, about 2 inches from bottom edge and 2 inches from side seam. Sew in place using B.
Edging
With B, join yarn at bottom right corner. Work sc evenly up right front, around neck, and down left front, then along bottom edge. Fasten off. Weave in ends.
Assembly and Finishing
Use the long tails and a tapestry needle to seam the shoulders, set in the sleeves, and close the side and sleeve seams with a simple whipstitch, keeping the seams soft and flat so they don't rub delicate skin. Sew the pockets on last, using B and small, even stitches around each circle. Weave in all ends on the wrong side, then gently steam-block the cardigan to smooth the seams and open up the waffle texture, patting the pockets flat while damp.
Pro Tips and Variations
- Swap the pocket colors for a two-tone look, or work the edging in color C for a paler contrast.
- Add a single crochet button loop at the neck and one small button if you'd like a closure.
- For a slightly larger size, add a few stitches to the starting chains and a few rows to the body and sleeves, keeping the waffle repeat intact.