Sage Fringed Mug Mat Knit Free Pattern
Introduction
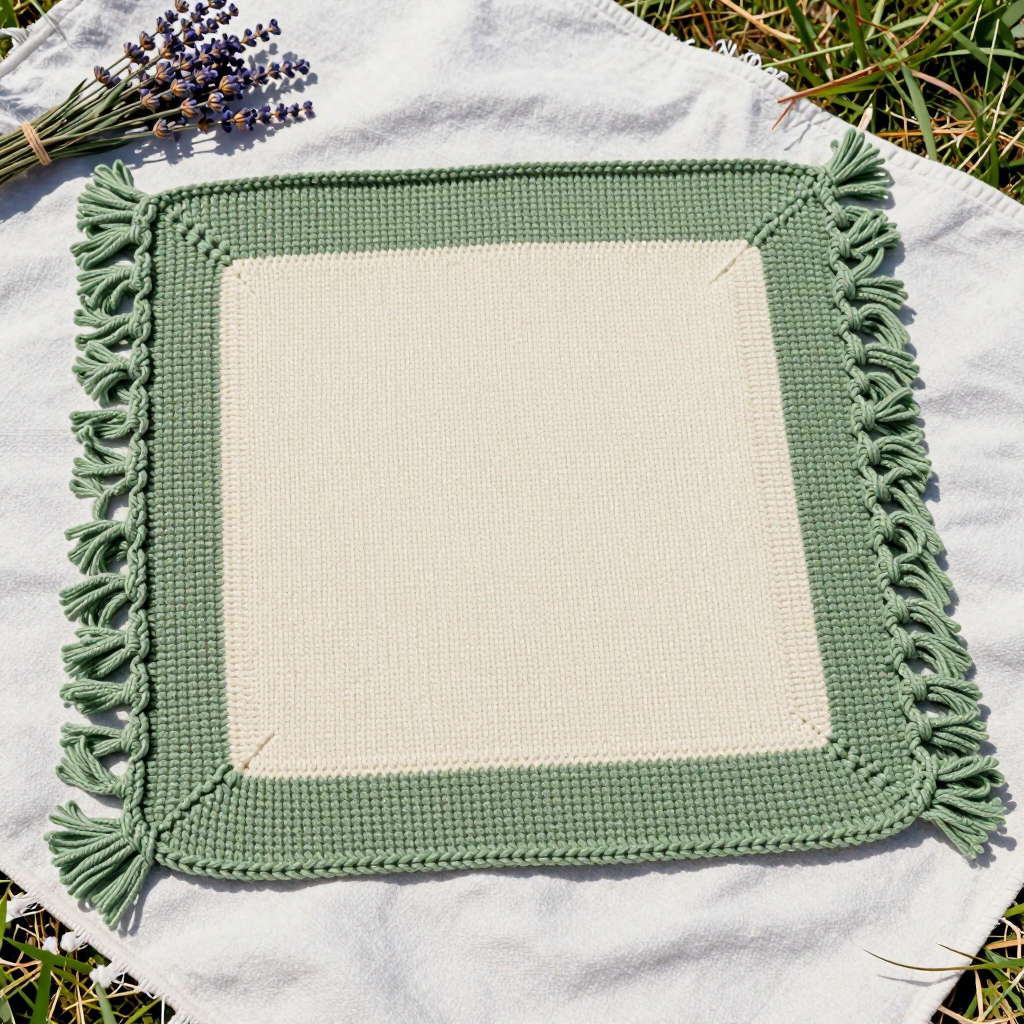
This Sage Fringed Mug Mat is the perfect little project for an advanced beginner who wants something finished in an evening or two. It pairs a smooth cream stockinette center with a wide sage green garter-stitch border, then finishes with short fringe on two opposite sides for that cozy retro 90s placemat look. The mat is flat, sturdy, and about 7 inches square, so it sits nicely under a mug, a small plant, or a candle on your coffee table. Because it is knit in worsted cotton, it feels smooth and absorbent, and it washes up beautifully after everyday spills.
Materials Needed
- Yarn: Worsted weight (category 4), 100% cotton. Color A (cream): approx 30 yd / 27 m. Color B (sage green): approx 45 yd / 41 m.
- Needles: 4.5 mm (US 7) straight needles.
- Notions: Crochet hook (approx 4.5 mm) for attaching fringe, tapestry needle, scissors, and a ruler or tape measure.
- Finished size: Approx 7 in / 18 cm square, excluding fringe. Fringe adds approx 1 in / 2.5 cm on each fringed side.
Abbreviations
- st(s): stitch(es)
- k: knit
- p: purl
- RS: right side (the smooth, public-facing side of the mat)
- WS: wrong side (the back of the mat)
- garter stitch: knitting every row, which makes a ridged, textured fabric
- stockinette stitch: knit on the RS rows and purl on the WS rows, which makes a smooth fabric
Gauge
18 sts x 24 rows = 4 in / 10 cm in stockinette stitch, blocked. Knit a small swatch in stockinette, block it, and measure a 4 in / 10 cm section to confirm your stitch and row counts match before starting.
Tips Before You Start
- Slip the first stitch of every row purlwise with the yarn in front. This gives you a neat, tidy edge that makes the fringe easy to attach later.
- When you change colors, give the old yarn a gentle tug and carry the unused color loosely up the side. Keep the carried strand relaxed so the mat stays flat.
- Count your stitches at the end of every border row. The border should always be 8 stitches on each side, and the cream center should always be 16 stitches.
- Block the mat before adding fringe. Blocking evens out the stockinette center and squares up the corners so the fringe hangs evenly.
Step-by-Step Instructions
Notes: Worked flat, back and forth. Slip the first stitch of every row purlwise with yarn in front for a neat edge. The border is garter stitch (knit every row); the center is stockinette (knit on RS rows, purl on WS rows).
Main Mat
Cast on: With Color B (sage), cast on 32 sts.
Border setup: Knit 8 rows in garter stitch (32 sts).
Row 1 (RS): With B, k8; change to A (cream), k16; change to B, k8 (32 sts).
Row 2 (WS): With B, k8; with A, p16; with B, k8 (32 sts).
Rows 3–30: Repeat Rows 1–2 fourteen times (32 sts). The piece should measure approx 5 in / 13 cm from the cast-on edge, ending after a WS row.
Top border: Change to B and knit 8 rows in garter stitch (32 sts).
Bind off: Bind off knitwise.
Fringe
Cut strands: Cut 24 strands of Color B, each 4 in / 10 cm long (this makes 12 bundles of 2 strands).
Attach bundles: Hold 2 strands together and fold them in half. Use the crochet hook to pull the fold through a stitch along one short edge, then pull the strand ends through the loop and tighten. Attach 6 bundles evenly spaced along each of the two opposite short edges (12 bundles total).
Trim: Trim the fringe ends evenly to approx 1 in / 2.5 cm.
Assembly and Finishing
Weave in all ends on the wrong side of the mat, working them through a few stitches in the same color so they stay hidden. Block the mat to 7 in / 18 cm square by misting it lightly and pinning it flat, then let it dry completely. If you prefer, attach the fringe after blocking so the bundles hang straight and even. Give the fringe a final trim once the mat is dry.
Pro Tips and Variations
- Swap the cream center for a soft oatmeal or butter yellow for a warmer retro palette, or use a striped center in two colors.
- Make a set of four mats in coordinating sage and cream combinations for a matching coffee table set.
- Add fringe to all four sides instead of two for a fuller, more decorative placemat look, using 6 bundles per side.