Neon Tulip Bowl Hugger Free Crochet Pattern
Introduction
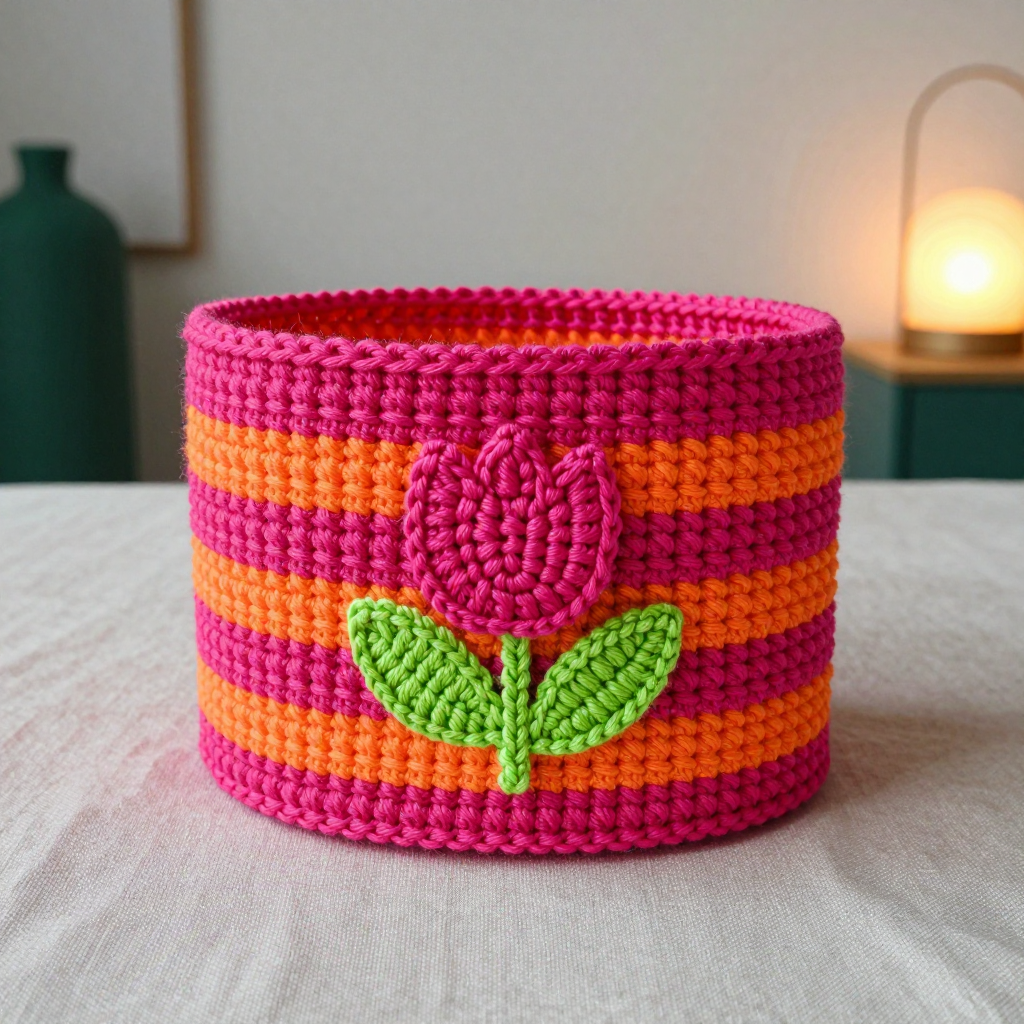
This Neon Tulip Bowl Hugger is a cheerful, folk-art-inspired cozy that wraps around a standard 6–7 inch bowl to protect your hands from hot soups and sides. It's a wonderfully beginner-friendly project: every stitch is single crochet, and the straight-sided cylinder means no tricky shaping after the flat base. The bold neon magenta and tangerine stripes give it a playful modern look, while the little tulip appliqué adds a handmade, garden-fresh charm. Worked in worsted weight cotton, it feels dense, sturdy, and satisfyingly quick to finish.
Materials Needed
- Yarn: Worsted weight (4) cotton yarn — 80 yds neon magenta (A), 40 yds tangerine (B), 10 yds lime green (C)
- Hook: 6.5 mm (K/10.5)
- Notions: Stitch marker, tapestry needle, scissors
- Finished size: Fits a standard 6–7 inch diameter bowl; approximately 4.5 inches tall and 7 inches wide
Abbreviations
- st(s): stitch(es)
- sc: single crochet
- inc: increase — work 2 sc in the same stitch
- dec: decrease — work 2 sc together into one stitch
- MR: magic ring
- ch: chain
- hdc: half double crochet
- dc: double crochet
- sl st: slip stitch
- rnd(s): round(s)
Gauge
12 sts and 12 rnds = 4 inches in single crochet. To check, work a small flat swatch in sc and measure a 4-inch section; adjust your hook size if needed to match.
Tips Before You Start
- Use a stitch marker in the first stitch of each round — the cozy is worked in continuous rounds, so the beginning can drift.
- Keep your tension even and slightly firm; a dense fabric holds its shape and insulates better.
- Change colors on the last stitch of the previous round for clean, even stripes.
- Cotton yarn has little stretch, so check the fit over your bowl before fastening off the body.
Step-by-Step Instructions
Base (Color A)
Rnd 1: MR, 6 sc (6 sts)
Rnd 2: inc x6 (12 sts)
Rnd 3: [sc, inc] x6 (18 sts)
Rnd 4: [2 sc, inc] x6 (24 sts)
Rnd 5: [3 sc, inc] x6 (30 sts)
Rnd 6: [4 sc, inc] x6 (36 sts)
Rnd 7: [5 sc, inc] x6 (42 sts)
Rnd 8: [6 sc, inc] x6 (48 sts)
Rnd 9: [7 sc, inc] x6 (54 sts)
Rnd 10: [8 sc, inc] x6 (60 sts)
Rnd 11: [9 sc, inc] x6 (66 sts)
Rnd 12: [10 sc, inc] x6 (72 sts)
Body (Stripes)
Rnds 13–16: sc in each st around (72 sts) — Color A
Rnds 17–18: sc in each st around (72 sts) — change to Color B
Rnds 19–20: sc in each st around (72 sts) — change to Color A
Rnds 21–40: Continue working sc in each st around (72 sts), alternating 2 rounds Color B and 2 rounds Color A, ending on a Color B band. Fasten off.
Tulip Appliqué (Color A)
Rnd 1: MR, 6 sc (6 sts)
Rnd 2: inc x6 (12 sts)
Rnd 3: [sc, inc] x6 (18 sts)
Rnds 4–6: sc in each st around (18 sts)
Rnd 7: [sc, dec] x6 (12 sts)
Rnd 8: dec x6 (6 sts)
Fasten off, leaving a long tail for sewing.
Leaves (Color C) — make 2
Row 1: Ch 7 (7 chs)
Row 2: sc in 2nd ch from hook, hdc, dc, hdc, sc, sl st in last ch. Fasten off.
Assembly and Finishing
Sew the tulip to the front of the cozy, centered over Rnds 23–30, using the long tail and a tapestry needle. Sew the two leaves under the tulip, pointing outward. Weave in all ends securely on the inside. Block lightly by misting with water and shaping flat; let dry completely before use.
Pro Tips and Variations
- Swap the neon palette for soft pastels or classic red-and-cream for a different folk-art mood.
- Add a contrasting slip-stitch edging around the rim for a tidy finish.
- Make a matching set in different stripe colors for a cheerful table.