Moss Stitch Oval Face Pad Pair: Free Crochet Pattern
Introduction
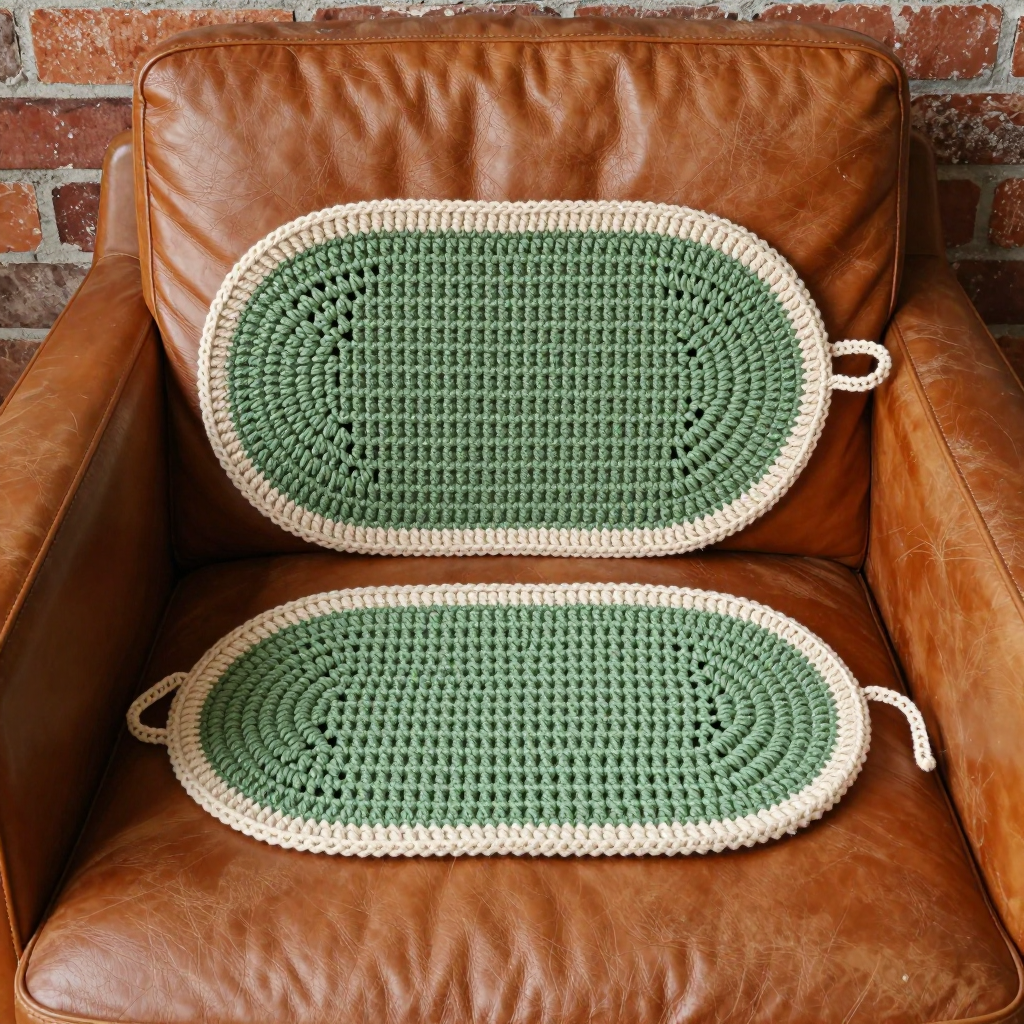
These moss stitch oval face pads are a gentle, eco-friendly swap for disposable cotton rounds, and they are just as lovely to make as they are to use. Worked flat from a simple chain-start center, each pad grows into a soft oval with a bumpy, textured surface that feels gentle on skin. The sage green body with its narrow ecru border gives them a calm, Scandinavian look that suits any bathroom shelf. If you can single crochet and chain, you can make this pair in an evening.
Materials Needed
- Yarn: Worsted weight (4) cotton yarn, approximately 30 yds total: 20 yds sage green (A) and 10 yds ecru (B). Cotton is recommended because it is absorbent, washable, and soft against the face.
- Hook: 5.0 mm (H-8) crochet hook.
- Notions: Tapestry needle for weaving in ends, scissors, and a stitch marker (optional).
- Finished size: Each pad is approximately 3.5 inches (9 cm) wide by 4.5 inches (11.5 cm) long.
Abbreviations
- ch – chain: yarn over and pull through the loop on your hook.
- sc – single crochet: insert hook into stitch, yarn over, pull up a loop, yarn over, pull through both loops.
- sk – skip: miss the next stitch without working into it.
- sp – space: the gap made by a chain (for example, a ch-1 sp).
- sl st – slip stitch: insert hook, yarn over, pull through both the stitch and the loop on your hook.
- rep – repeat.
Gauge
14 sts and 14 rows = 4 inches (10 cm) in moss stitch pattern. To check, crochet a small swatch in pattern and measure a 4-inch section; adjust your hook size if your stitches are much larger or smaller than this.
Tips Before You Start
- Keep your chain-1 spaces loose and even. Tight chain spaces make the moss stitch fabric stiff, and this pad should stay soft and flexible.
- Count your chain-1 spaces at the end of each row. Each moss row should have exactly 4 ch-1 spaces, which keeps the oval shape even.
- Use a smaller hook for the ecru edging if you tend to crochet loosely, so the border stays flat and does not ruffle.
- Work both pads at the same time if you like, so your tension and color amounts stay consistent across the pair.
Step-by-Step Instructions
Pad (make 2)
Work with color A (sage green).
Setup: With A, ch 10.
R1: Sc in 2nd ch from hook, sc in each ch across, turn. (9 sc)
R2: Ch 1, sc in first sc, [ch 1, sk next sc, sc in next sc] 4 times, turn. (5 sc, 4 ch-1 sps)
R3: Ch 1, sc in first sc, [sc in ch-1 sp, ch 1, sk next sc] 4 times, sc in last sc, turn. (6 sc, 4 ch-1 sps)
R4: Ch 1, sc in first sc, [ch 1, sk next sc, sc in ch-1 sp] 4 times, sc in last sc, turn. (5 sc, 4 ch-1 sps)
R5–14: Rep R3–4 five times, ending with R4. (5 sc, 4 ch-1 sps)
R15: Ch 1, sc in each sc and ch-1 sp across, turn. (9 sc)
Do not fasten off. Change to B (ecru).
Edging (each pad)
Edging: Ch 1, sc evenly around the entire pad, working 3 sc in each corner, join with sl st to first sc. Fasten off. Weave in ends.
Ties (optional, make 2)
Tie: With B, ch 30, sl st in each ch across. Fasten off. Attach to a corner of each pad. Weave in ends.
Assembly and Finishing
These pads are made as two separate pieces, so there is no seaming between them. If you added ties, use your tapestry needle to sew the end of each tie securely to one corner of its pad, then weave the tail through a few stitches on the wrong side. Weave in all remaining ends, splitting the yarn and running it back and forth through nearby stitches so it will not work loose in the wash. Block each pad lightly by misting with water and patting it flat into an even oval; let it dry completely before use. Do not iron the moss stitch fabric, as pressing will flatten the texture.
Pro Tips and Variations
- Make a matching set in different colors, such as dusty blue with cream, to color-code pads for different family members.
- Add a hanging loop instead of a tie by chaining 12 and slip stitching back down, then attaching it to one corner.
- Work a second round of ecru edging for a wider border stripe, or swap the ecru for a soft charcoal for a bolder contrast.