Gold Crochet Pinecone Ornament Free Pattern
Introduction
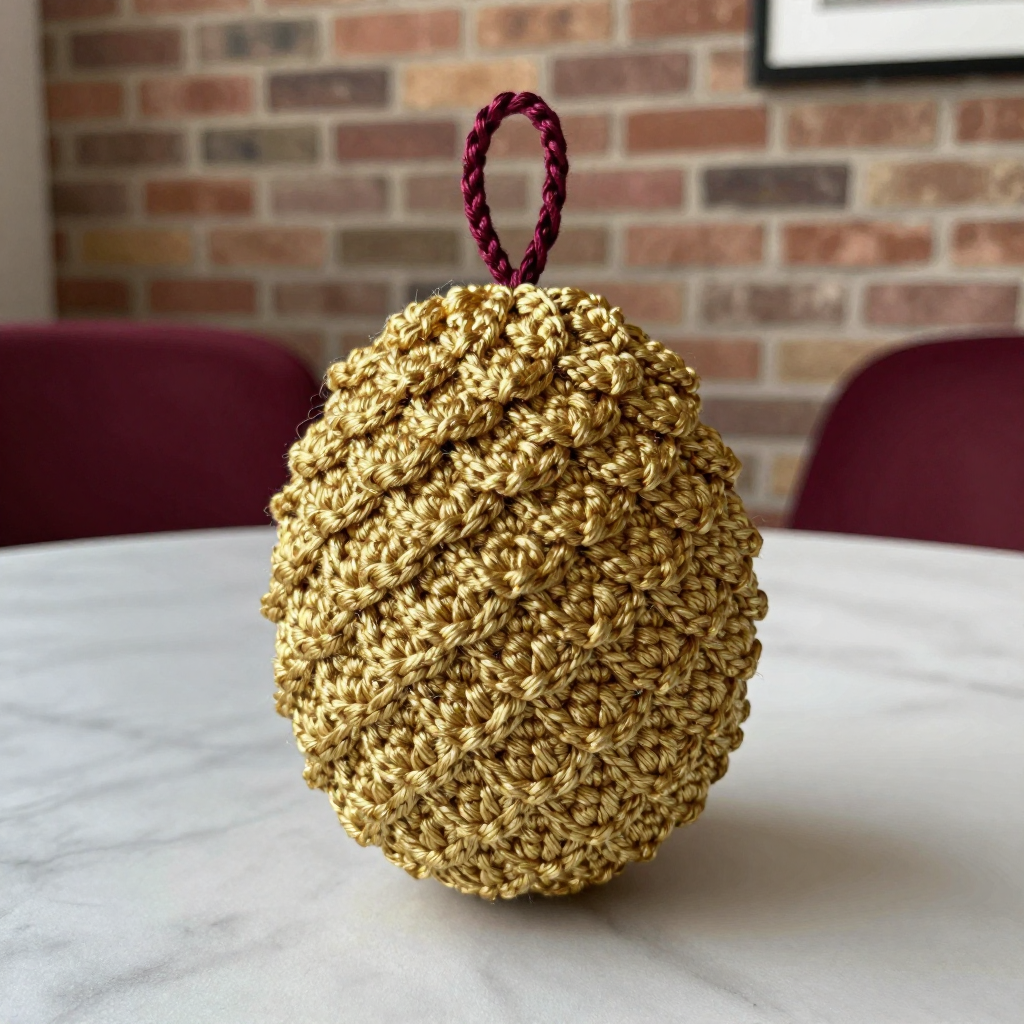
This little gold pinecone ornament is the perfect project for anyone who has mastered single crochet and is ready to try shaping with increases and decreases. Worked in worsted-weight gold acrylic with a rich burgundy hanging loop, it captures the cozy look of a real pinecone in a miniature, festive form. The egg-shaped body is covered in twelve overlapping scales, giving it a layered, textured surface that catches the light beautifully on a tree or wreath. At just 2.5 inches wide and 3 inches tall, it works up quickly and feels sturdy and dimensional in your hand.
Materials Needed
- Worsted weight (4) yarn, 100% acrylic: gold (approx. 30 yds) and burgundy (approx. 5 yds)
- 4.0 mm (G-6) crochet hook
- Yarn needle for sewing and weaving in ends
- Scissors
- Stitch marker (optional, for marking rounds)
- Finished size: 2.5 inches wide x 3 inches tall (including loop)
Abbreviations
- ch – chain: make a loop of yarn and pull it through the loop on your hook
- sc – single crochet: insert hook, pull up a loop, yarn over, pull through both loops
- inc – increase: work 2 single crochet stitches into the same stitch
- dec – decrease: work 2 stitches together into 1 (insert hook in next stitch, pull up a loop, insert in following stitch, pull up a loop, yarn over, pull through all 3 loops)
- sc2tog – single crochet 2 together: same as a decrease worked over 2 stitches
- sc3tog – single crochet 3 together: work 3 stitches together into 1
- sl st – slip stitch: insert hook, yarn over, pull through both the stitch and the loop on your hook
- MR – magic ring: an adjustable loop used to begin working in the round
- st(s) – stitch(es)
- Rnd – round
Gauge
20 sts x 20 rows = 4 inches in single crochet. To check, crochet a small swatch in sc and measure a 4-inch section; adjust your hook size if needed to match.
Tips Before You Start
- Work the body in a continuous spiral and use a stitch marker to track the start of each round.
- Keep your tension even and fairly tight so the body holds its egg shape and the scales sit flat.
- Make all twelve scales first, then arrange them on the body before sewing so you can adjust the overlap.
- Leave generous tails on the scales and loop for easy sewing and secure fastening.
Step-by-Step Instructions
Body (gold)
Rnd 1: MR, 6 sc into ring (6 sts).
Rnd 2: inc x6 (12 sts).
Rnd 3: [sc, inc] x6 (18 sts).
Rnd 4: [2 sc, inc] x6 (24 sts).
Rnd 5: [3 sc, inc] x6 (30 sts).
Rnds 6-9: sc in each st around (30 sts).
Rnd 10: [3 sc, dec] x6 (24 sts).
Rnd 11: [2 sc, dec] x6 (18 sts).
Rnd 12: [sc, dec] x6 (12 sts).
Rnd 13: dec x6 (6 sts).
Fasten off, weave tail through remaining sts, and pull tight to close.
Scales (gold, make 12)
Row 1: Ch 6, sc in 2nd ch from hook and each ch across (5 sts).
Row 2: Ch 1, turn, sc in each st across (5 sts).
Row 3: Ch 1, turn, sc2tog, sc, sc2tog (3 sts).
Row 4: Ch 1, turn, sc in each st across (3 sts).
Row 5: Ch 1, turn, sc3tog (1 st).
Fasten off, leaving a tail for sewing.
Hanging Loop (burgundy)
Loop: Ch 12, join with sl st to form a ring. Fasten off, leaving a tail.
Assembly and Finishing
Sew the scales to the body in overlapping rows: begin at the bottom and attach 6 scales around Rnds 6-7, then 4 scales around Rnds 9-10, then 2 scales at the top. Sew the burgundy hanging loop to the top center of the body. Weave in all ends securely. Lightly steam or block the ornament to smooth the scales and shape the body, then let it dry completely.
Pro Tips and Variations
- Use a contrasting metallic yarn for the scales to make the pinecone texture stand out.
- Add a small bead or jingle bell at the base for extra festive charm.
- Make a set in different colors—silver, copper, or green—for a coordinated ornament collection.