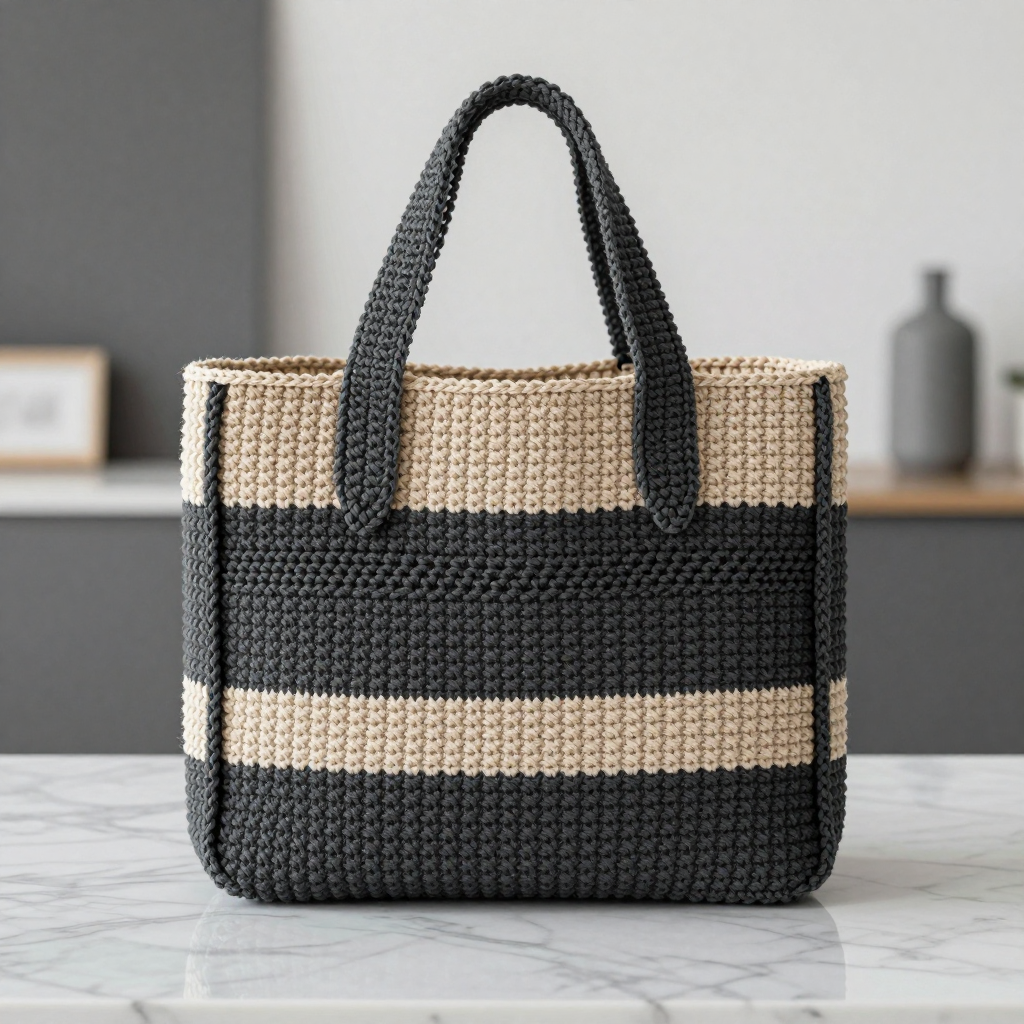
Charcoal & Oatmeal Lunch Tote Free Crochet Pattern
Introduction
This Charcoal & Oatmeal Lunch Tote is a sturdy, boxy little bag that's perfect for carrying your lunch, a small knitting project, or everyday essentials. It's designed with beginners in mind: the whole tote is made from plain single crochet worked in flat panels, so you only need one basic stitch to finish the entire project. The deep charcoal body with a wide oatmeal stripe near the top gives it a clean, Nordic-inspired look that feels calm and modern. Worked in worsted-weight cotton, it holds its shape nicely and has a firm, satisfying texture that's easy to wipe clean.
Materials Needed
- Yarn: Worsted weight (4) cotton or cotton-acrylic blend. Color A (charcoal): 200 yds. Color B (oatmeal): 80 yds.
- Hook: 5.0 mm (H-8) crochet hook
- Notions: Yarn needle, scissors, stitch markers (optional), tape measure
- Finished size: Approx. 9" wide x 7" tall x 4" deep
Abbreviations
- ch — chain: make a loop of yarn and pull it through the loop on your hook.
- sc — single crochet: insert hook into stitch, yarn over, pull up a loop, yarn over, pull through both loops.
- st(s) — stitch(es)
- RS — right side: the outside face of your work.
- A — charcoal; B — oatmeal
Gauge
16 sts and 16 rows = 4 inches in single crochet. Crochet a small swatch, measure a 4-inch section, and adjust your hook size if you have more or fewer stitches than this.
Tips Before You Start
- Keep your single crochet tension even and slightly firm — a tight, consistent fabric is what gives this tote its boxy shape.
- Count your stitches at the end of every row. The panels must stay exactly 16 or 36 stitches wide so the corners line up when you seam.
- When you change to oatmeal for the stripe, work the last pull-through of the previous stitch in the new color for a clean transition.
- Lay the base flat and mark the four edges before joining yarn, so you divide the stitches evenly.
Step-by-Step Instructions
Base (Color A)
Ch 37.
Row 1: Sc in 2nd ch from hook and each ch across (36 sts).
Rows 2–16: Ch 1, turn, sc in each st across (36 sts).
Fasten off.
Short Sides (Color A) — make 2
Row 1: Join A to one short edge of the base, sc evenly across (16 sts).
Rows 2–28: Ch 1, turn, sc in each st across (16 sts).
Fasten off. Repeat on the opposite short edge.
Front and Back (Color A) — make 2
Row 1: Join A to one long edge of the base, sc evenly across (36 sts).
Rows 2–28: Ch 1, turn, sc in each st across (36 sts).
Fasten off. Repeat on the opposite long edge.
Stripe (Color B)
Work the stripe on all four sides at the same height.
Rows 29–36: Change to B, ch 1, turn, sc in each st across (16 sts on short sides, 36 sts on front and back).
Fasten off.
Seaming the Corners
With RS facing, whipstitch the side edges of the front and back panels to the side edges of the short side panels, matching the stripe rows so the oatmeal band runs continuously around the tote.
Top Edging (Color B)
Rnd 1: Join B at the top edge, sc evenly around the top (approx. 104 sts).
Fasten off.
Handles (Color A) — make 2
Ch 25.
Row 1: Sc in 2nd ch from hook and each ch across (24 sts).
Fasten off. Attach handles to the front and back panels, 2" in from the side edges and 1" down from the top edge, using the yarn needle and color A.
Assembly and Finishing
If you haven't already, whipstitch all four corner seams with RS facing, matching the stripe rows as described above. Attach both handles securely, stitching through each end several times for strength. Weave in all ends on the wrong side, then block lightly: mist the tote, shape it into a neat rectangle, and let it dry flat so the boxy shape sets.
Pro Tips and Variations
- Add a fabric lining for extra structure and easy cleaning — cut a rectangle to fit and hand-sew it just below the top edging.
- Swap the stripe colors for a two-tone look, or work the handles in oatmeal for a bolder contrast.
- Make a larger version by adding rows to the panels and chains to the base — just keep the stitch counts matched on all four sides.